
Table of Contents
Table of Contents
1. Introduction
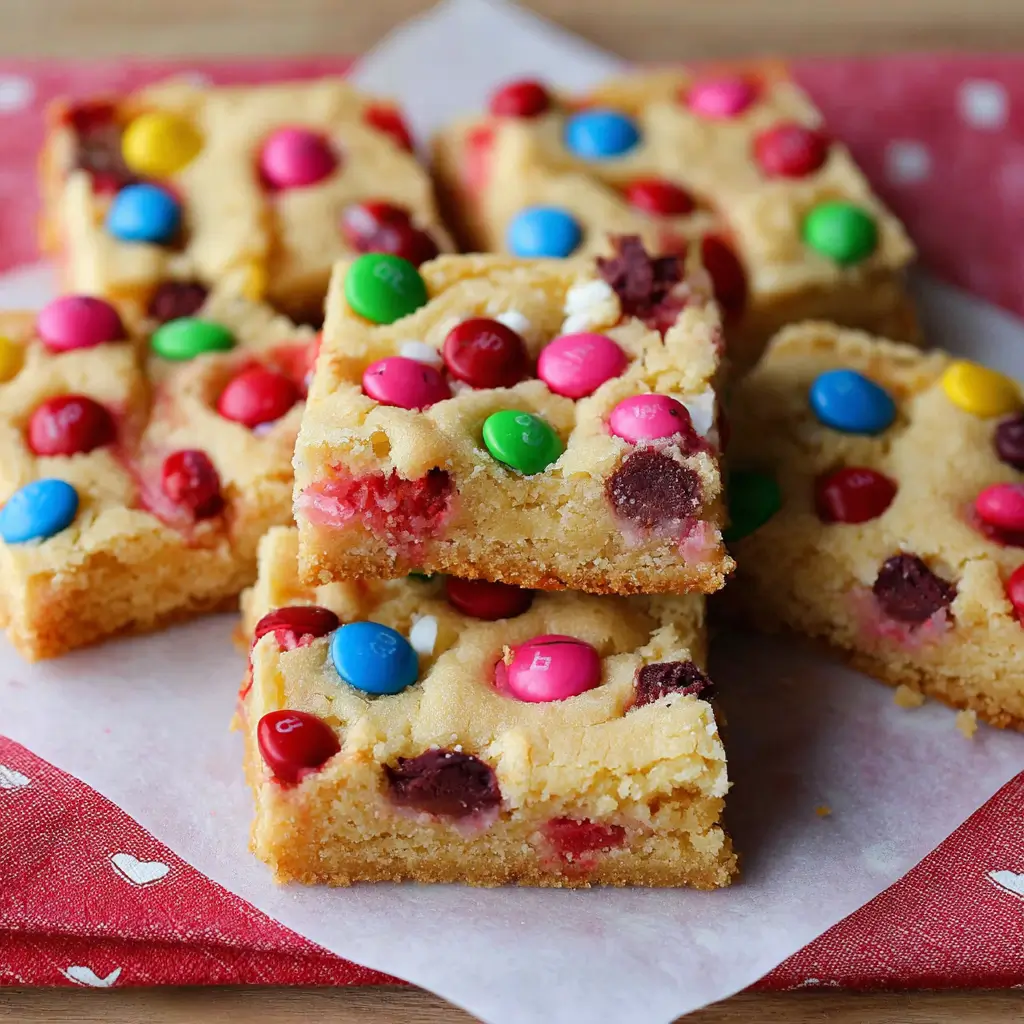
There are some desserts that just whisper “comfort” and “joy” with every bite, and M&M Sugar Cookie Bars undoubtedly top that list. Imagine a golden, buttery sugar cookie base, perfectly chewy at the edges and wonderfully soft in the center, studded generously with a kaleidoscope of colorful M&M’s. Each bar is a miniature celebration, a delightful symphony of textures and flavors that transports you straight back to carefree childhood days. This isn’t just a recipe; it’s an invitation to create edible happiness, a simple yet profoundly satisfying treat that brings smiles to faces of all ages.
The story of the sugar cookie itself is a heartwarming journey, tracing its roots back to the 1700s in Nazareth, Pennsylvania. Originally known as Nazareth Sugar Cookies, they were a simple concoction, beloved for their tender crumb and sweet simplicity. Over centuries, this humble cookie evolved, embracing new forms and additions, but its core appeal remained. The cookie bar, a genius adaptation, simplifies the baking process by transforming individual cookies into a convenient, shareable slab. No more scooping dozens of cookies; just press, bake, and slice! This innovation made cookie bars an instant hit at potlucks, bake sales, and family gatherings, becoming synonymous with easy-to-share deliciousness.
The introduction of M&M’s chocolate candies in 1941 added another layer of excitement to the cookie world. Their vibrant candy shells, designed to “melt in your mouth, not in your hand,” quickly made them a household favorite. When these colorful chocolate morsels met the classic sugar cookie, a magical union occurred. The M&M Sugar Cookie Bar became a phenomenon, a vibrant, playful twist on a beloved classic. It perfectly captures the essence of American dessert culture – wholesome, approachable, and bursting with fun. Their universal appeal lies in their simplicity, the nostalgic crunch of the candy-coated chocolate, and the inherent cheerfulness they bring to any table.
Beyond their delicious taste, M&M Sugar Cookie Bars hold a significant place in many homes as a go-to recipe for celebrations and everyday cravings alike. They are the ultimate crowd-pleaser, effortlessly adaptable for holidays by simply changing the M&M colors, and always a welcome sight at any event. Whether you’re baking for a school fundraiser, a birthday party, a holiday gathering, or simply want to brighten a Tuesday afternoon, these bars deliver on every promise. Their straightforward preparation means even novice bakers can achieve spectacular results, making them an accessible entry point into the wonderful world of baking. Let’s embark on this delightful culinary adventure, creating not just a dessert, but memories bathed in sweetness and color.
2. Recipe Summary
This M&M Sugar Cookie Bar recipe is designed for maximum flavor with minimal fuss, making it a stellar addition to any home baker’s repertoire.
- Cuisine: American Dessert. This recipe epitomizes classic American comfort baking, featuring familiar ingredients and straightforward techniques that result in a universally loved sweet treat. It’s a staple at picnics, potlucks, and holiday gatherings across the country.
- Difficulty Level: Easy. This recipe is perfect for beginners and seasoned bakers alike. The steps are intuitive, requiring no specialized skills beyond basic baking knowledge. The use of a single baking pan simplifies the process significantly compared to baking individual cookies.
- Total Preparation and Cooking Time:
- Prep Time: Approximately 20-25 minutes. This includes gathering ingredients, mixing the dough, and pressing it into the pan. Using room temperature ingredients is crucial and should be factored into overall planning, though not strictly “prep” time.
- Cook Time: 25-30 minutes. Baking time can vary slightly depending on your oven and the thickness of your bars, so visual cues are key.
- Cooling Time: 1-2 hours. While often overlooked, proper cooling is essential for the bars to set and achieve their perfect chewy texture, making them easy to slice cleanly.
- Total Time (active + passive): Roughly 1 hour 45 minutes to 2 hours 30 minutes. This includes cooling, which is vital for the final product.
- Dietary Classification: Vegetarian. This recipe contains dairy (butter) and eggs, making it suitable for vegetarians. For those with specific dietary needs, mindful substitutions can be made, though the original recipe is crafted for a classic indulgent experience. For instance, while not explicitly gluten-free or vegan, experienced bakers might explore using 1:1 gluten-free flour blends or plant-based butter and egg substitutes with varying results. However, this recipe’s inherent richness relies on traditional dairy and eggs.
3. Equipment and Utensils
Having the right tools makes the baking process smoother and more enjoyable. Here’s a comprehensive list of what you’ll need for these M&M Sugar Cookie Bars:
- Large Mixing Bowl: Essential for combining the wet and dry ingredients without spills. A bowl with at least a 4-quart (3.8-liter) capacity is ideal to accommodate all ingredients comfortably.
- Medium Mixing Bowl: Useful for whisking together dry ingredients separately before adding them to the wet mixture, ensuring even distribution. A 2-quart (1.9-liter) bowl works well here.
- Electric Mixer (Stand or Handheld): While you can mix by hand, an electric mixer is highly recommended for creaming the butter and sugars until light and fluffy, a critical step for tender bars. A stand mixer with a paddle attachment offers convenience, but a powerful handheld mixer will also suffice.
- Rubber Spatula or Wooden Spoon: For scraping down the sides of the bowl, folding in the M&M’s, and pressing the dough into the pan. A sturdy rubber spatula is best for ensuring no ingredients are left unmixed.
- Measuring Cups (Dry): For accurately measuring flour, sugar (granulated and brown), and M&M’s. A set typically includes 1 cup, 1/2 cup, 1/3 cup, and 1/4 cup.
- Measuring Spoons: For precise measurements of baking soda, salt, and vanilla extract. A standard set includes 1 tbsp, 1 tsp, 1/2 tsp, and 1/4 tsp.
- Liquid Measuring Cup: For measuring vanilla extract if you prefer not to use measuring spoons (though spoons are more accurate for small amounts).
- 9×13 Inch Baking Pan: This is the standard size for these cookie bars, yielding a good thickness. A light-colored metal pan is generally preferred as it conducts heat evenly and prevents over-browning of the edges, though a glass pan can also work (you might need to reduce the baking temperature slightly by 25°F/15°C). Ensure it has at least 2-inch (5 cm) high sides.
- Parchment Paper: Crucial for easy removal of the bars from the pan and minimal cleanup. Cut a sheet to fit the pan, leaving an overhang on the longer sides to create “handles.” This also helps prevent sticking.
- Cooling Rack: Allows air to circulate around the bars as they cool, preventing sogginess and ensuring an even texture. A standard wire rack is perfect.
- Sharp Knife or Bench Scraper: For clean, precise cuts once the bars have cooled completely. A long, sharp chef’s knife or a bench scraper can make neat work of slicing.
- Oven Mitts: For safely handling the hot baking pan.
Having these tools at the ready will streamline your baking process, allowing you to focus on the delicious creation at hand.
4. Serving Suggestions
M&M Sugar Cookie Bars are delightful on their own, but a few thoughtful additions can elevate the experience and make them even more special.
- Plating Recommendations:
- Classic Squares: Once fully cooled, cut the bars into neat squares or rectangles. For a clean cut, use a sharp knife and wipe it clean between each slice, especially if the M&M’s create sticky spots. Arrange them artfully on a large white platter to highlight their vibrant colors.
- Stacked High: For a party or buffet, stack the bars in a pyramid or alternating pattern on a tiered dessert stand. This creates visual appeal and makes them easy for guests to grab.
- Individual Portions: For a more elegant presentation, serve individual bars on small dessert plates, perhaps with a dusting of powdered sugar or a delicate drizzle of melted white chocolate.
- Cookie Bar Bites: For smaller appetites or a more extensive dessert spread, cut the bars into smaller, bite-sized pieces. These are perfect for easy antipasto skewers or a diverse dessert platter.
- Side Dish Ideas (or rather, Accompaniments):
- Ice Cream: A scoop of classic vanilla bean ice cream is a natural pairing, offering a cool, creamy contrast to the warm, chewy cookie bar (if serving slightly warm). Chocolate or strawberry ice cream also complements the M&M flavors beautifully.
- Whipped Cream: A dollop of freshly whipped cream can add a touch of lightness and luxury. Consider infusing the cream with a hint of vanilla or a dash of cinnamon for an extra layer of flavor.
- Chocolate Sauce: A drizzle of homemade or store-bought chocolate fudge sauce can enhance the chocolatey notes from the M&M’s, making it an even more decadent treat.
- Caramel Drizzle: For those who love a sweet and salty combination, a generous swirl of caramel sauce adds a rich depth that pairs wonderfully with the buttery cookie.
- Beverage Pairings:
- Cold Milk: The quintessential pairing! A tall, frosty glass of milk is the perfect companion to these sweet, chewy bars, balancing the richness and cleansing the palate.
- Coffee or Tea: For adults, a hot cup of coffee, especially a robust dark roast or a creamy latte, provides a comforting contrast. Herbal teas or a classic black tea can also be a delightful choice, offering a less intense pairing. Consider a festive option like warm cranberry and rosemary spiced cider for a holiday feel or a homemade spiced pumpkin latte during autumn months.
- Hot Chocolate: A rich, creamy hot chocolate enhances the chocolate experience, making for an extra indulgent treat, especially on a chilly day.
- Sparkling Cider: For a non-alcoholic celebratory option, a crisp sparkling apple cider can offer a refreshing counterpoint to the cookie bars’ sweetness.
No matter how you choose to serve them, these M&M Sugar Cookie Bars are guaranteed to be a hit, bringing cheer and deliciousness to any occasion.
5. Nutritional Information
Understanding the nutritional profile of M&M Sugar Cookie Bars is helpful for mindful eating, especially as they are a delightful indulgence. Keep in mind that these figures are approximate and can vary based on specific ingredient brands, exact measurements, and the size of your servings. The recipe yields a large batch, so portion control is key.
- Calories per Serving: Assuming this recipe yields 24 modest-sized bars (from a 9×13-inch pan), each serving could contain approximately 250-320 calories. This can increase if bars are cut larger or if additional toppings like ice cream or sauces are added.
- Macronutrient Distribution (per serving, approximate):
- Carbohydrates: Expect around 35-45 grams per bar. This is primarily from sugars (granulated, brown, and M&M’s) and flour.
- Fats: Approximately 12-18 grams per bar. The majority of this comes from butter and the chocolate in the M&M’s. Saturated fat will be a significant portion of the total fat content due to the butter and chocolate.
- Protein: Around 2-4 grams per bar. This comes from the eggs and a small amount from the flour and M&M’s.
- Dietary Information and Allergens:
- Common Allergens: This recipe unequivocally contains wheat (all-purpose flour), dairy (butter, M&M’s), eggs, and potentially soy (lecithin in M&M’s). Individuals with allergies to these ingredients should avoid the recipe or seek appropriate substitutions.
- Vegetarian: Yes, this recipe is suitable for vegetarians as it contains no meat, poultry, or fish.
- Gluten-Free: Not in its original form. However, a 1:1 gluten-free baking flour blend can often be substituted successfully, though the texture might vary slightly.
- Vegan: Not in its original form, due to butter and eggs. Vegan butter and egg substitutes can be used, but this would significantly alter the original recipe and flavor profile.
- High in Sugar: As a dessert, these bars are naturally high in sugar.
- Cholesterol: Present due to butter and eggs.
- Sodium: Moderate, mainly from salt and some in baking soda.
- Health Benefits (and considerations):
- Energy Boost: The carbohydrates and fats provide a quick source of energy, making them a good occasional treat.
- Mood Enhancer: Let’s be honest, few things lift spirits like a delicious homemade cookie bar. The psychological benefit of enjoying a sweet treat is real, promoting feelings of happiness and comfort.
- Moderation is Key: While delicious, due to their high sugar and fat content, M&M Sugar Cookie Bars are best enjoyed in moderation as part of a balanced diet. They are a delightful indulgence meant for special occasions or as an occasional treat rather than a daily staple.
- Homemade Advantage: Baking at home allows you to control the quality of ingredients, avoiding artificial additives and preservatives often found in store-bought versions. You can also adjust the amount of sugar or M&M’s to your preference, creating a slightly healthier (or more indulgent!) version.
Enjoying these vibrant, chewy bars is a treat for the senses and the soul. Just remember to savor each bite thoughtfully!
6. Storage and Reheating
Proper storage is crucial to maintain the delightful chewiness and freshness of your M&M Sugar Cookie Bars. While reheating isn’t typically recommended for this type of cookie, understanding how to store them will ensure they taste fantastic for days.
- Storage Instructions (Room Temperature):
- Cool Completely: This is the most important step before storage. Warm bars will create condensation inside an airtight container, leading to sogginess. Allow the bars to cool completely on a wire rack in the pan for at least 1-2 hours, or until they are no longer warm to the touch.
- Airtight Container: Once cooled and sliced, transfer the bars to an airtight container. A plastic container with a tight-fitting lid or a cookie tin works perfectly.
- Layering: If stacking multiple layers of bars, place a sheet of parchment paper or wax paper between each layer to prevent them from sticking together.
- Placement: Store the container in a cool, dry place away from direct sunlight. The pantry or countertop is usually fine.
- Shelf Life: When stored properly at room temperature, M&M Sugar Cookie Bars will remain fresh and delicious for 3-5 days. Their texture might soften slightly over time, but the flavor will remain excellent.
- Refrigeration:
- Purpose: Refrigeration can extend the shelf life of the bars, especially in warmer climates, or if you prefer a firmer, chewier texture.
- Method: Place cooled bars in an airtight container, again using parchment paper between layers if stacking.
- Shelf Life: In the refrigerator, the bars can last for up to 7-10 days.
- Texture Change: Refrigerating them will make them firmer and denser. To enjoy them with a softer texture, simply let them come to room temperature for 15-30 minutes before serving.
- Freezing:
- Purpose: Freezing is an excellent option for long-term storage, allowing you to enjoy these treats weeks or even months later.
- Method:
- Cool and Slice: Ensure the bars are completely cool. You can freeze them as a whole slab or pre-cut into individual bars. Pre-cutting is often more convenient for grabbing single servings later.
- Flash Freeze (Optional but Recommended): Arrange the bars in a single layer on a baking sheet lined with parchment paper. Freeze for about 30-60 minutes until firm. This prevents them from sticking together when packaged.
- Wrap Securely: Once firm, wrap individual bars (or the whole slab) tightly in plastic wrap, then an additional layer of aluminum foil. This double-layer protection helps prevent freezer burn.
- Airtight Container/Bag: Place the wrapped bars into a freezer-safe airtight container or a heavy-duty freezer bag. Squeeze out as much air as possible from the bag.
- Shelf Life: Frozen M&M Sugar Cookie Bars can last for up to 2-3 months without significant loss of quality.
- Thawing: To thaw, simply remove the desired number of bars from the freezer and let them sit at room temperature for an hour or two until fully defrosted. For a quicker thaw, you can unwrap and microwave for 10-20 seconds on low power, but be careful not to overheat.
- Reheating Methods:
- Generally, these cookie bars are best enjoyed at room temperature or slightly chilled from the refrigerator. Reheating in an oven or microwave can dry them out or alter their delicate texture, making the M&M’s melt excessively.
- If you absolutely must warm them (e.g., if pairing with ice cream), a quick 5-10 second burst in the microwave for an individual bar might soften it slightly without melting the M&M’s too much. For oven, wrap in foil and heat at 275°F (135°C) for 5-7 minutes, but this is often unnecessary.
Following these storage guidelines will ensure your M&M Sugar Cookie Bars remain a delicious treat, ready to satisfy your sweet cravings whenever they strike.
7. Expert Tips and Variations
Elevate your M&M Sugar Cookie Bars from good to legendary with these professional insights and creative twists.
- Professional Chef Tips:
- Room Temperature Ingredients are Key: This cannot be stressed enough, especially for butter and eggs. Room temperature butter creams beautifully with sugar, incorporating more air for a lighter, softer texture. Cold ingredients resist emulsification, resulting in a dense, sometimes greasy, dough. Take butter out at least an hour before, and eggs about 30 minutes.
- Don’t Overmix the Dough: Once you add the flour, mix only until just combined. Overmixing develops the gluten in the flour, leading to tough, chewy (in a bad way) bars rather than tender ones. A few streaks of flour are fine; they’ll disappear during the gentle folding of M&M’s.
- Underbake Slightly: For truly soft and chewy bars, pull them from the oven when the edges are set and lightly golden, but the center still looks slightly soft or even a little underdone. They will continue to bake and set as they cool in the hot pan. This is the secret to a moist, never-dry bar.
- Chill the Dough (Optional but Recommended for Flavor): If time allows, chilling the dough for 30 minutes to an hour can deepen the flavors, allow the flour to fully hydrate, and make the dough less sticky and easier to press into the pan. It also helps prevent spreading, though bars are less prone to this than individual cookies.
- Reserve M&M’s for Topping: To ensure a vibrant, colorful top, reserve about 1/2 cup (120g) of M&M’s to press gently into the top of the dough right before baking. This prevents them from sinking entirely and showcases their cheerful colors.
- Common Mistakes to Avoid:
- Overbaking: The most common culprit for dry, hard cookie bars. Watch closely and err on the side of underbaking.
- Not Lining the Pan: Skipping parchment paper means a sticky mess and potentially broken bars when trying to remove them. Always line the pan, leaving an overhang.
- Uneven Dough Distribution: Ensure the dough is pressed evenly into the pan so that the bars bake uniformly. Thicker spots will be undercooked, thinner spots overcooked. Use a spatula or your hands (lightly floured if sticky) for this.
- Warm M&M’s: If your M&M’s are too warm, their colors might bleed more significantly into the dough. Store them in a cool place until ready to use.
- Recipe Variations:
- Chocolate Chip Swirl: Fold in a mix of M&M’s and your favorite chocolate chips (milk, semi-sweet, dark).
- Nutty Crunch: Add 1/2 cup (60g) of chopped pecans, walnuts, or almonds along with the M&M’s for added texture and flavor.
- Extract Exploration: A touch of almond extract (1/4 tsp) can add a subtle, sophisticated note. You could also try a hint of orange zest for a bright flavor.
- White Chocolate M&M’s: Use white chocolate M&M’s or substitute some of the classic M&M’s with white chocolate chips for a different flavor profile.
- Brown Butter: For an extra layer of nutty, complex flavor, brown your butter before creaming it with the sugars. Just be sure to let it cool slightly before mixing. This adds a gourmet touch to an otherwise simple bar.
- Seasonal Adaptations:
- Holiday Cheer: M&M’s come in a fantastic array of seasonal colors. For Christmas, use red and green M&M’s; for Valentine’s Day, red and pink; for Easter, pastels; and for Halloween, orange, black, and purple. This makes the bars incredibly versatile for any holiday spread. Consider pairing them with other festive treats like orange zest and mascarpone cranberry bliss bars for a vibrant holiday platter.
- Halloween Fun: For a spooky twist, use Halloween-themed M&M’s and perhaps add a few candy googly eyes on top of the bars after they’re baked and slightly cooled, similar to how one might decorate spooky spiderweb cupcakes. This makes them a perfect treat for costume parties or fall gatherings.
- Summer Brights: Use bright, primary colored M&M’s for summer picnics and pair them with refreshing desserts like an easy hawaiian poke cake recipe.
These tips and variations ensure that your M&M Sugar Cookie Bars are not only perfectly baked but also endlessly customizable, allowing your creativity to shine in the kitchen.
8. Ingredients Section
Crafting the perfect M&M Sugar Cookie Bars starts with quality ingredients. Here’s what you’ll need, along with helpful measurements and substitutions.
Yields: 24 bars (using a 9×13 inch pan)
Prep time: 20-25 minutes
Bake time: 25-30 minutes
Ingredients List
- Unsalted Butter: 1 cup (2 sticks / 226 grams)
- Sourcing: Opt for a good quality butter with at least 80% butterfat. Unsalted is preferred as it allows you to control the salt content in the recipe. Ensure it is softened to room temperature for optimal creaming.
- Substitution: For a dairy-free option, use a high-quality plant-based butter alternative that’s designed for baking (e.g., Miyoko’s Kitchen Cultured Vegan Butter). The texture might vary slightly.
- Granulated Sugar: 1 ½ cups (300 grams)
- Sourcing: Standard white granulated sugar.
- Substitution: Organic cane sugar can be used as a direct 1:1 substitute.
- Light Brown Sugar (packed): ½ cup (100 grams)
- Sourcing: Light brown sugar adds moisture and a subtle caramel note, contributing to the chewy texture. Make sure to pack it tightly when measuring.
- Substitution: Dark brown sugar can be used for a deeper molasses flavor and even chewier bar, but the color will be darker.
- Large Eggs: 2
- Sourcing: Fresh, large eggs are crucial for binding the ingredients and adding richness. Ensure they are at room temperature.
- Substitution: For an egg-free option, you can try flax eggs (1 tbsp ground flaxseed + 3 tbsp water per egg, let sit for 5 minutes) or a commercial egg replacer, though the texture may be slightly different.
- Vanilla Extract: 2 teaspoons (10 ml)
- Sourcing: Pure vanilla extract provides the best flavor. Avoid imitation vanilla if possible.
- Substitution: Vanilla bean paste can be used for a more intense vanilla flavor and visible vanilla flecks.
- All-Purpose Flour: 2 ½ cups (300 grams)
- Sourcing: Standard unbleached all-purpose flour works perfectly.
- Substitution: For a gluten-free version, use a 1:1 gluten-free all-purpose baking flour blend that contains xanthan gum.
- Baking Soda: 1 teaspoon (5 grams)
- Sourcing: Ensure your baking soda is fresh for optimal leavening.
- Salt: ½ teaspoon (3 grams)
- Sourcing: Fine sea salt or table salt works well to balance the sweetness.
- M&M’s Milk Chocolate Candies: 1 ½ cups (270 grams), plus extra for sprinkling on top (about ½ cup/90 grams)
- Sourcing: Standard M&M’s milk chocolate candies are ideal. You can find these at any grocery store.
- Substitution: Feel free to use different varieties of M&M’s (peanut, crispy, dark chocolate) or substitute with chocolate chips, sprinkles, or other candy-coated chocolates for varied flavors and textures. For a festive touch, stained glass holiday cookies with dried fruit offer a similar visual appeal with different ingredients, providing inspiration for creative holiday baking.
Measurement Conversions (Approximate)
To assist bakers globally, here are approximate conversions between imperial and metric systems:
- Butter: 1 cup = 2 sticks = 8 oz = 226 grams
- Granulated Sugar: 1 cup = 200 grams
- Brown Sugar: 1 cup (packed) = 200 grams
- Flour: 1 cup = 120 grams
- M&M’s: 1 cup = 180 grams
- Teaspoon (tsp): 1 tsp = 5 ml
- Tablespoon (tbsp): 1 tbsp = 15 ml
Always use proper measuring techniques: level dry ingredients with a straight edge and use liquid measuring cups for liquids at eye level. This ensures accuracy and consistent results every time.
9. Step-by-Step Instructions
Follow these detailed instructions to bake perfect M&M Sugar Cookie Bars that are soft, chewy, and bursting with color.
Before You Begin (Mise en Place):
- Ensure butter and eggs are at room temperature. This is crucial for a smooth, well-combined dough.
- Pre-measure all your ingredients.
- Line your baking pan as directed below.
- Prepare Your Oven and Pan:
- Preheat your oven to 350°F (175°C).
- Lightly grease a 9×13 inch (23×33 cm) baking pan.
- Line the greased pan with parchment paper, leaving an overhang on the longer sides. This overhang will act as “handles” to easily lift the cooled bars out of the pan. Greasing the pan first helps the parchment paper stick in place.
- Cream Butter and Sugars:
- In your large mixing bowl, using an electric mixer (stand or handheld) fitted with the paddle attachment, cream together the softened 1 cup (226g) unsalted butter, 1 ½ cups (300g) granulated sugar, and ½ cup (100g) packed light brown sugar.
- Beat on medium-high speed for 2-3 minutes, or until the mixture is light, fluffy, and pale in color. This process incorporates air into the butter, contributing to the bars’ tender texture. Scrape down the sides of the bowl as needed.
- Add Eggs and Vanilla:
- Reduce the mixer speed to low. Add the 2 large eggs one at a time, beating well after each addition until just combined.
- Stir in the 2 teaspoons (10ml) vanilla extract. Beat until the mixture is smooth and fully incorporated, scraping the bowl sides once more. Avoid overmixing at this stage.
- Combine Dry Ingredients:
- In your medium mixing bowl, whisk together the 2 ½ cups (300g) all-purpose flour, 1 teaspoon (5g) baking soda, and ½ teaspoon (3g) salt. Whisking ensures these dry ingredients are evenly distributed, so your bars rise properly and have consistent flavor.
- Gradually Add Dry to Wet:
- With the mixer on low speed, gradually add the dry ingredient mixture to the wet mixture, a third at a time.
- Mix only until just combined and no streaks of dry flour remain. Be very careful not to overmix, as this can lead to tough bars. The dough will be thick and somewhat sticky.
- Fold in M&M’s:
- Remove the bowl from the mixer. Using a rubber spatula, gently fold in 1 ½ cups (270g) M&M’s milk chocolate candies.
- Mix until the M&M’s are evenly distributed throughout the dough.
- Press Dough into Pan:
- Transfer the cookie dough to the prepared 9×13 inch baking pan.
- Using your hands (you might lightly flour them if the dough is too sticky) or a rubber spatula, press the dough evenly into the bottom of the pan. Ensure the dough is spread from edge to edge and has a consistent thickness for even baking.
- For a vibrant top, sprinkle the reserved ½ cup (90g) M&M’s over the surface of the dough and gently press them in place.
- Bake the Bars:
- Place the baking pan in the preheated oven.
- Bake for 25-30 minutes. The bars are done when the edges are lightly golden brown and set, but the center still looks slightly soft or puffed up. A toothpick inserted into the center may come out with moist crumbs, but not wet batter. Remember, slightly underbaked is key for chewiness!
- Troubleshooting: If your oven runs hot, check a few minutes early. If the edges are browning too quickly, you can loosely tent the pan with foil for the last 5-10 minutes of baking.
- Cool Completely and Slice:
- Once baked, remove the pan from the oven and place it on a wire cooling rack.
- Allow the bars to cool in the pan for at least 1-2 hours, or until they are completely cool to the touch. This crucial step allows the bars to set, firm up, and become perfectly chewy, making them much easier to slice cleanly. Rushing this step will result in crumbly, messy bars.
- Once cool, use the parchment paper overhang to lift the entire slab of cookie bars out of the pan and transfer it to a cutting board.
- Using a sharp knife, slice the bars into 24 squares (4 rows by 6 columns) or your desired size. For cleaner cuts, wipe the knife blade clean between each slice, especially if M&M’s melt slightly on the blade.
Enjoy your delicious homemade M&M Sugar Cookie Bars!
10. Frequently Asked Questions (FAQ)
Here are some common questions about M&M Sugar Cookie Bars, providing clear answers for home bakers.
Q1: Can I make M&M Sugar Cookie Bars ahead of time?
Yes, absolutely! These bars are an excellent make-ahead dessert. You can bake them up to 3-5 days in advance and store them in an airtight container at room temperature. They can also be frozen for up to 2-3 months. Freezing them pre-sliced allows for easy thawing of individual portions, making them a convenient option for future cravings or unexpected guests.
Q2: Why are my M&M Sugar Cookie Bars dry or crumbly?
The most common reason for dry or crumbly cookie bars is overbaking. Sugar cookie bars are best when slightly underbaked in the center, allowing them to finish setting as they cool. Make sure to pull them from the oven when the edges are lightly golden but the center still looks a bit soft. Using room temperature butter and eggs, and avoiding overmixing the flour into the dough, are also key to maintaining moisture and tenderness.
Q3: Can I use different types of M&M’s or other candies?
Definitely! This recipe is incredibly versatile. You can use peanut M&M’s, crispy M&M’s, dark chocolate M&M’s, or even seasonal colors to match holidays (like red and green for Christmas). Feel free to substitute half or all of the M&M’s with chocolate chips (milk, semi-sweet, or white), sprinkles, chopped nuts, or other small candies. For a unique holiday treat with a different aesthetic, you might enjoy making stained glass holiday cookies with dried fruit which also showcase vibrant colors.
Q4: How do I prevent the M&M’s from sinking to the bottom of the bars?
While a few M&M’s sinking is normal, you can minimize it by chilling your dough for 30 minutes before pressing it into the pan. More effectively, reserve about half a cup of M&M’s and gently press them onto the top of the dough after you’ve spread it in the pan, just before baking. This ensures a beautiful, colorful top layer.
Q5: Can I make these M&M Sugar Cookie Bars gluten-free?
Yes, you can! To make these bars gluten-free, substitute the all-purpose flour with a 1:1 gluten-free all-purpose baking flour blend that contains xanthan gum. The texture might be slightly different, sometimes a bit denser or more crumbly, but the flavor will still be delicious. Always ensure your chosen blend is suitable for cookies and bars.
Q6: What’s the best way to cut clean, neat bars?
For the cleanest cuts, ensure the bars are completely cooled before slicing. If they’re still warm, they’ll be soft and prone to crumbling. Use a long, sharp chef’s knife. For extra neatness, wipe the knife blade clean with a damp paper towel between each cut, especially if melted chocolate from the M&M’s sticks to it. Lifting the cooled slab out of the pan using the parchment paper overhang before cutting on a flat surface also helps.
Q7: Are these suitable for freezing?
Yes, M&M Sugar Cookie Bars freeze beautifully! Once completely cooled, you can freeze them as a whole slab or pre-cut individual bars. Wrap them tightly in plastic wrap, then in aluminum foil, and place them in a freezer-safe bag or container. They can be frozen for up to 2-3 months. Thaw at room temperature for an hour or two before serving. This is a great way to stock up your freezer with delightful treats, just like preparing for a big event where you might also serve mini quiche bites.