
1. Introduction
When summer arrives, bringing with it the abundance of sweet, fragrant peaches, our kitchens beckon with possibilities. While biting into a fresh peach is pure bliss, transforming them into a baked treat elevates their natural sweetness to something truly divine. These Heavenly Summer Peach Bars are just that – a perfect capture of peak season flavor in a format that’s easy to make, share, and enjoy.
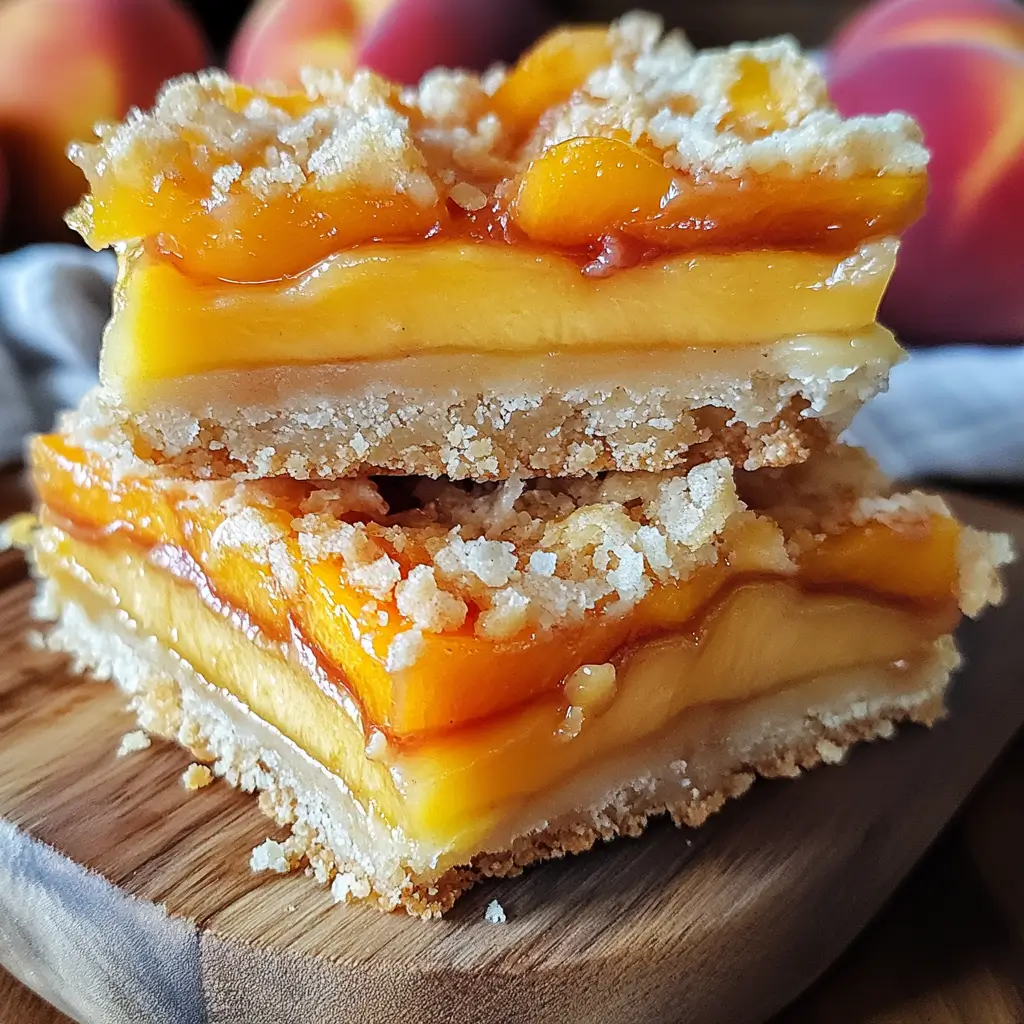
Forget complicated pies; these bars offer all the comfort of a classic fruit dessert with a much simpler structure. Each bar is a delightful stack of textures: a tender, buttery shortbread-style crust provides a sturdy foundation. Piled on top is a generous layer of juicy peaches, tossed with just enough sugar and flour to create a sweet, slightly thickened filling as it bakes. Capping it all off is a crumbly, golden topping made with butter, flour, and sugars, offering a delightful textural contrast to the soft fruit below.
The combination of warm, bubbly peaches and sweet, crumbly topping, nestled on a tender crust, is simply irresistible. These bars are perfect for picnics, potlucks, bake sales, or simply as a comforting dessert on a warm evening here in Marrakesh or wherever summer finds you. They embody the sweet spirit of the season in every single bite. If you love baked peach desserts, you might also enjoy our Classic Peach Crisp Recipe, which features a similar fruit and crumble combination.
2. Recipe Summary
These Heavenly Summer Peach Bars are a delightful layered dessert featuring fresh peaches and a simple crumb topping, baked on a tender shortbread crust.1
- Cuisine: American / Dessert
- Difficulty Level: Easy-Medium (involves multiple components)
- Prep Time: 20-25 minutes
- Cook Time: 60-68 minutes (approx. 15-18 mins for crust + 45-50 mins for bars)
- Total Time: Approximately 1 hour 30 minutes – 2 hours (including bake time, plus cooling)
- Servings: 16 bars (cut from a 9×9 inch pan)
- Dietary Classification: Vegetarian (contains dairy). Can be adapted to be Vegan (using plant-based butter and sugar) or Gluten-Free (using certified gluten-free flour and checking other ingredients).
3. Equipment and Utensils
Making these layered peach bars requires several common kitchen tools for preparing each component.
- 9×9 inch baking pan: This size pan is perfect for creating bars with a good thickness, ensuring a nice ratio of crust, filling, and topping in every slice.
- Parchment paper: Essential for lining the baking pan. Leave an overhang on the sides; this acts as handles, making it incredibly easy to lift the cooled, baked bars out of the pan for clean slicing.
- Medium bowl (for crust): For combining the flour, sugar, and salt for the crust and cutting in the cold butter.
- Large bowl (for filling): You’ll need a bowl big enough to hold all the sliced peaches comfortably and toss them gently with the sugar, flour, lemon juice, and vanilla. A bowl with a capacity of at least 3-4 quarts (approx. 3-4 liters) is recommended.
- Separate bowl (for crumb topping): A medium-sized bowl is needed to mix the dry ingredients for the crumb topping and stir in the melted butter.
- Measuring cups and spoons: For accurately measuring all the dry and liquid ingredients.
- Pastry cutter or fork: Used specifically for cutting the cold butter into the dry ingredients for the crust. This creates the classic crumbly texture of a shortbread-style crust.
- Spoon or rubber spatula: For stirring ingredients, tossing the peaches, spreading the filling, and scooping the crumb topping.
- Knife: A sharp knife is needed for peeling, pitting, and slicing the peaches, and later for cutting the cooled bars into squares.2
- Vegetable peeler (optional): Can be used for peeling the peaches, or you can use the blanching method (briefly boiling then shocking in ice water) which makes the skins slip off easily (similar to preparing fruit for recipes like our Easy Homemade Strawberry Jam Recipe).
- Wire rack: For allowing the baked bars to cool completely in the pan.
- Oven mitts: For safely handling the hot pan.
- Oven: For preheating and baking both the crust and the assembled bars.
Having these tools ready before you start will streamline the process, making it easier to move from preparing one layer to the next.
4. Serving Suggestions
Heavenly Summer Peach Bars are a fantastic dessert for sharing and are best served once completely cooled, offering a wonderful sweet treat on their own or with classic accompaniments.
- Plating: Once cooled and sliced, arrange the bars on a platter or serve them individually on dessert plates. Dusting with powdered sugar (as suggested) adds a pretty, finished look.
- Garnishes: While delicious as is, a few simple garnishes can make them even more special:
- Powdered sugar (as mentioned in the recipe, a light dusting over the top).
- A scoop of vanilla ice cream (as suggested). The melting ice cream is a perfect partner to the tender fruit and crumb topping.
- A dollop of whipped cream.
- A few extra slices of fresh peach or a fresh berry placed on the side.
- Side Dish Ideas: As a dessert, these bars don’t typically require savory side dishes. They are often the sweet conclusion to a meal.
- Complementary Side Dishes: (Items served with the bars, not alongside). Vanilla ice cream and whipped cream are the most popular creamy additions.
- Wine or Beverage Pairings: To complement the sweetness and fruit flavors:
- Wine: A late-harvest dessert wine, a Moscato d’Asti, or a sweet Prosecco with stone fruit notes would be a lovely pairing.
- Non-Alcoholic: A warm cup of coffee or tea, a cold glass of milk, or a refreshing iced tea would also be great choices. For another peachy drink, consider our Easy Homemade Peach Lemonade Recipe.
Serve the bars at room temperature or slightly chilled after refrigerating. Allowing them to cool completely before slicing is crucial for clean cuts and set layers.
5. Nutritional Information
While the provided recipe does not include a full nutritional breakdown, we can discuss the general nutritional considerations of these Heavenly Summer Peach Bars based on their ingredients.
- Calories: Specific calorie count per serving is not provided in the original text. The calorie content will come primarily from the sugars (granulated and brown sugar, natural fruit sugars), fats (butter), and carbohydrates (flour, fruit).
- Macronutrient Distribution: Detailed macronutrient (Protein, Carbohydrates, Fat, Saturated Fat) information is not provided in the original recipe text.
- These bars will contain carbohydrates from the fruit, sugar, and flour.
- They will contain fat, particularly saturated fat, from the butter.
- They will contain a small amount of protein from the flour and fruit.
- Dietary Information: Specific values for cholesterol, sodium, potassium, fiber, and total sugar are not provided in the original recipe text.
- They will contain dietary fiber from the peaches.
- The total sugar content will be relatively high due to the added sugars and natural fruit sugars.
- Sodium will be present from the added salt. Cholesterol will be present from the butter.
- Vitamin & Mineral Information: Specific values for vitamins and minerals are not provided in the original recipe text.
- They will contain Vitamin C and Vitamin A from the peaches.
General Health Considerations: These Heavenly Summer Peach Bars are a classic dessert, intended as a sweet treat rather than a health food. They contain added sugars and fats from butter. Enjoying a moderate portion as part of a balanced diet is recommended. They offer some vitamins and fiber from the fresh peaches.
6. Storage and Reheating
Proper storage is important to keep your Heavenly Summer Peach Bars fresh and maintain their texture, especially the crumb topping.
- Proper Storage Instructions: Once the bars have cooled completely (this is crucial!), lift them out of the pan using the parchment paper overhang and transfer them to a cutting board. Cut them into squares. Store the cut bars in an airtight container. You can layer the bars between sheets of parchment or wax paper to prevent them from sticking together.
- Refrigeration Instructions: Due to the fresh fruit filling, it is recommended to store these bars in the refrigerator, especially if you live in a warm climate. They will keep well in the refrigerator for 3-4 days. Note that the crumb topping may soften in the refrigerator due to moisture absorption.
- Freezing Recommendations: Baked and cooled peach bars (without any powdered sugar dusting or added garnishes) freeze well.
- Wrap the entire slab (before cutting) tightly in plastic wrap and then aluminum foil, or cut into individual bars and wrap each one before placing them in a freezer-safe container. Freeze for up to 2-3 months.
- Thawing Frozen Bars:
- Thaw frozen bars overnight in the refrigerator.
- Reheating Methods: While often served at room temperature or chilled, gently warming the bars can enhance the flavor of the peaches. Reheating is also a good way to try and re-crisp the topping slightly.
- Oven (Recommended): The best way to reheat is in a preheated oven at 300°F (150°C). Place bars on a baking sheet and reheat for 10-15 minutes, or until warmed through. This method helps the crumb topping regain some crispness.
- Microwave: Individual bars can be reheated in the microwave, but this will soften the crust and crumb topping. Heat until just warmed through (usually 30-60 seconds depending on size).
- Add powdered sugar dusting or other garnishes after reheating.
For the best texture, especially that lovely crumbly topping, try to eat these bars within a day or two of baking, or reheat them in the oven.
7. Expert Tips and Variations
Creating Heavenly Summer Peach Bars is a rewarding process, and a few expert tips along with creative variations can make them even more spectacular.
Tips from Professional Chefs:
- Use Ripe Peaches, But Not Too Soft: Choose peaches that are fragrant and yield slightly to gentle pressure, but are not overly soft or mushy. Ripe peaches offer the best sweetness and flavor. Peeling them (blanching is easiest – see our Easy Homemade Strawberry Jam Recipe for how-to) ensures a smooth filling.
- Cold Butter is Key for the Crust: Just like making pie crust or shortbread, using cold, cubed butter and cutting it into the dry ingredients for the base creates that tender, crumbly shortbread-style texture. The cold butter pieces melt slowly in the oven, creating steam and flaky layers. Use a pastry cutter or your fingertips, working quickly.
- Melted Butter for the Crumb Topping: In contrast to the crust, using melted butter for the crumb topping is intentional. This method coats the dry ingredients more uniformly, resulting in a topping that forms lovely, distinct clumps and bakes up golden and slightly crisp, but is less “shortbread-like” than the base.
- Let the Crust Cool Slightly: Allowing the pre-baked crust to cool for 5-10 minutes before adding the peach filling helps prevent the hot fruit from making the crust soggy immediately.
- Toss Peaches Gently but Thoroughly: Ensure the sliced peaches are evenly coated with the sugar, flour, lemon juice, and vanilla. The flour helps to absorb some of the peach juices released during baking, creating a nice slightly thickened filling rather than a watery one. Don’t overmix and break up the peaches.
- Cool Completely Before Cutting: Patience is key! Allowing the bars to cool completely in the pan (several hours, or even refrigerating for an hour or two after they reach room temperature) is crucial before lifting them out and cutting them into squares. This allows the fruit filling and the crust to set properly, resulting in clean, neat slices. Warm bars will be messy and fall apart.
Common Mistakes to Avoid:
- Not Cooling Completely Before Slicing: The most common mistake, leading to messy, collapsed bars.
- Overmixing the Crust Dough: Can result in a tough, hard crust instead of a tender, crumbly one. Mix just until the butter is cut in and crumbs form.
- Underbaking: The filling won’t be bubbly and set, and the crumb topping might be pale and lack flavor and crunch.
- Using Overly Soft Peaches: Can result in a mushy, overly watery filling.
- Not Using Parchment Paper: Makes removing the cooled bars for slicing much more difficult.
Creative Recipe Variations:
- Other Fruit Fillings: Substitute peaches with other fruits that bake well. Sliced apples (about 4-5 medium apples, sliced thinly – similar to the apple layer in our Apple Crisp Cheesecake with Caramel Crunch), berries (use about 4-5 cups total), or a mix of berries and rhubarb (like our Peach and Raspberry Crumble) would be delicious. Adjust sugar slightly based on the sweetness of the fruit.
- Add Oats to the Crumb Topping: For more of a “crisp” style topping, add 1/4 cup of rolled oats to the crumb topping mixture.
- Nutty Topping: Stir 1/4 cup of finely chopped pecans, walnuts, or almonds into the crumb topping mixture for added crunch and flavor.
- Spice it Up: Add 1/4 teaspoon of ground nutmeg or a pinch of ginger to the peach filling or the crumb topping for extra warmth. Increase the cinnamon in the crumb topping if you like a stronger spice flavor.
- Add Extracts: Stir 1/2 teaspoon of almond extract into the peach filling or the crumb topping for a complementary nutty flavor.
- Different Sugars: Use dark brown sugar in the crumb topping for a richer, more caramel-like flavor.
- Gluten-Free Adaptation: Substitute the all-purpose flour in both the crust and the crumb topping with a 1:1 certified gluten-free all-purpose flour blend. Ensure any other ingredients are GF.
- Vegan Adaptation: Substitute the unsalted butter in both the crust and the crumb topping with a plant-based butter alternative. Ensure the granulated and brown sugars are vegan.
8. Ingredients Section
Here is the complete list of ingredients needed to create these Heavenly Summer Peach Bars. Using fresh, ripe peaches will make all the difference in the flavor!
- Crust:
- 1 cup (120g) all-purpose flour: The main structure of the crust.
- 1/4 cup (50g) granulated sugar: Sweetens the crust.
- 1/4 teaspoon (1.25g) salt: Balances the sweetness and enhances flavor.
- 1/2 cup (113g) unsalted butter, cold and cut into cubes: Essential for the tender, crumbly texture of the crust.
- Filling:
- 3-4 large peaches (approx. 1.5 – 2 lbs / 680g – 900g), peeled, pitted, and sliced: Use ripe, fragrant peaches. Slice them about 1/2 inch thick.
- 1/2 cup (100g) granulated sugar: Sweetens the peach filling. Adjust slightly based on the sweetness of your peaches.
- 2 tablespoons (16g) all-purpose flour: Acts as a thickener, absorbing some of the peach juices.
- 1 tablespoon (15ml) lemon juice: Brightens the peach flavor and helps prevent browning. Freshly squeezed is best.
- 1/2 teaspoon (2.5ml) vanilla extract: Enhances the peach flavor.
- Crumb Topping:
- 1/2 cup (60g) all-purpose flour: Provides the base for the crumb topping.
- 1/4 cup (50g) granulated sugar: Adds sweetness.
- 1/4 cup (50g) brown sugar: Adds moisture and flavor. Packed firmly into the measuring cup.
- 1/4 teaspoon (0.5g) cinnamon: Adds warm spice to the topping.
- 1/4 teaspoon (1.25g) salt: Balances the sweetness.
- 1/4 cup (56g) unsalted butter, melted: Binds the crumb topping ingredients together.
Measurement Conversions (Approximate):
- 1 cup all-purpose flour ≈ 120g
- 1/4 cup granulated sugar ≈ 50g
- 1 teaspoon ≈ 5 ml or 5g (for dry spices)
- 1/2 cup unsalted butter ≈ 113g or 1 stick3
- 3-4 large peaches ≈ 1.5 – 2 lbs / 680g – 900g
- 1/2 cup granulated sugar ≈ 100g
- 1 tablespoon ≈ 15 ml or 8g (for flour)4
- 1/4 cup brown sugar ≈ 50g (packed)
- 1/4 cup unsalted butter ≈ 56g or 1/2 stick
Quality and Sourcing Recommendations:
- Choose ripe, in-season peaches for the best flavor.
- Use good quality unsalted butter for a pure, buttery taste. Ensure butter for the crust is cold and butter for the topping is melted as specified.
Possible Ingredient Substitutions:
- Peaches: See Variations section for other fruit options. Frozen sliced peaches (thawed and well-drained) can also be used, but fresh is preferred.
- Granulated Sugar: Adjust amount based on peach sweetness.
- All-Purpose Flour: Use a 1:1 gluten-free blend for GF bars.
- Unsalted Butter: Use salted butter and omit added salt from crust/topping, or use a plant-based alternative for vegan bars.
- Lemon Juice: Lime juice can be substituted.
- Vanilla Extract: Almond extract can be substituted or added.
- Brown Sugar: Use light or dark brown sugar.
Notes on Ingredient Preparation:
- Peel, pit, and slice the peaches just before combining with other filling ingredients to prevent browning.
- Cut the butter for the crust into small cold cubes.
- Melt the butter for the crumb topping.
- Measure all ingredients accurately.
9. Step-by-Step Instructions
Follow these detailed steps to assemble and bake your Heavenly Summer Peach Bars, creating perfect layers of flavor and texture.
- Preheat Oven and Prepare Pan:
- Preheat your oven to 350°F (175°C).
- Line a 9×9 inch baking pan with parchment paper, making sure to leave an overhang of parchment on two opposite sides. This overhang acts as handles to easily lift the cooled bars out of the pan later.
- Prepare the Crust:
- In a medium bowl, combine5 the 1 cup (120g) all-purpose flour, 1/4 cup (50g) granulated sugar, and 1/4 teaspoon (1.25g) salt. Stir these dry ingredients together.
- Add the 1/2 cup (113g) cold unsalted butter, cut into cubes. Use a pastry cutter or a fork (or your fingertips, working quickly) to cut the butter into the dry ingredients until the mixture resembles coarse crumbs, with some larger pea-sized pieces of butter remaining.
- Press the mixture evenly into the bottom of the prepared 9×9 inch baking pan. Use the bottom of a glass or measuring cup to help pack it down firmly into a compact layer.
- Bake in the preheated oven for 15-18 minutes, or until the edges of the crust are lightly golden.
- Remove the pan from the oven and let the crust cool slightly while you prepare the filling and topping.
- Make the Filling:
- In a large bowl, combine the sliced peaches (from 3-4 large peaches, peeled, pitted, and sliced).
- Add the 1/2 cup (100g) granulated sugar, 2 tablespoons (16g) all-purpose flour (which helps thicken the juices), 1 tablespoon (15ml) lemon juice, and 1/2 teaspoon (2.5ml) vanilla extract to the bowl with the peaches.
- Toss gently with a spoon or spatula to coat the peach slices evenly with the sugar and flour mixture. Be careful not to break up the peach slices.
- Prepare the Crumb Topping:
- In a separate bowl (medium size), mix together the 1/2 cup (60g) all-purpose flour, 1/4 cup (50g) granulated sugar, 1/4 cup (50g) packed brown sugar, 1/4 teaspoon (0.5g) cinnamon, and 1/4 teaspoon (1.25g) salt. Stir these dry ingredients together.
- Pour in the 1/4 cup (56g) melted unsalted butter.
- Stir with a spoon or fork until the mixture is well combined and forms a crumbly texture with some larger clumps.
- Assemble the Bars:
- Spread the peach filling evenly over the pre-baked and slightly cooled crust in the baking pan. Try to distribute the peach slices in a single layer if possible.
- Sprinkle the prepared crumb topping evenly over the entire surface of the peaches. Break up any large clumps with your fingers if needed to get even coverage.
- Bake:
- Place the assembled bars in the preheated oven (350°F / 175°C).
- Bake for 45-50 minutes, or until the crumb topping is golden brown and you can see the peach filling is bubbly around the edges of the pan.
- Cool and Slice:
- Remove the pan from the oven and allow the bars to cool completely in the pan on a wire rack. This step is crucial! The filling needs time to set as it cools. This can take several hours.
- Once completely cooled, use the parchment paper overhang to lift the entire slab of bars out of the pan and transfer it to a cutting board.
- Use a sharp knife to cut the bars into squares (typically cut into 4 rows by 4 rows for 16 bars). For neat cuts, you can wipe the knife clean with a warm, damp cloth between slices.
- Serve:
- Dust the top of the cut bars with powdered sugar before serving, if desired.
- Enjoy these Heavenly Summer Peach Bars on their own, or serve them slightly warmed with a scoop of vanilla ice cream (as suggested) or whipped cream.
10. Frequently Asked Questions (FAQ)
Here are some common questions about making and enjoying these Heavenly Summer Peach Bars.
- What kind of peaches should I use for this recipe? Use ripe, fragrant yellow peaches for the best flavor and texture. Ripe peaches are sweeter and soften nicely during baking. If fresh peaches are not in season, you can use high-quality frozen sliced peaches. Thaw them completely and drain off any excess liquid very well before using them in the filling, as extra moisture can make the filling watery.
- Can I use frozen peaches? Yes, you can use frozen sliced peaches. Make sure to thaw them completely and drain off any excess liquid before combining them with the other filling ingredients. This helps ensure the filling isn’t too watery.
- Why do you pre-bake the crust? Pre-baking the crust (also called blind baking) is done to give the crust a head start on baking and help it become firm and slightly crisp before the wet fruit filling is added. This prevents the bottom crust from becoming soggy during the longer final bake time with the juicy peaches.
- Why is the butter preparation different for the crust and the crumb topping? Using cold butter cut into the dry ingredients for the crust creates a shortbread-like texture that is tender and crumbly, providing a sturdy yet delicious base. Using melted butter for the crumb topping coats the dry ingredients more completely, resulting in distinct clusters and a topping that bakes up golden brown and offers a different kind of crumbly texture compared to the base.
- Why is my peach filling runny? A runny peach filling can be caused by several factors: using peaches that were overly ripe or released a lot of juice, not draining frozen peaches thoroughly, or not using enough flour (the 2 tablespoons of flour in the filling are essential for helping to absorb juices and thicken the filling as it bakes). Ensure you measure the flour accurately and consider adding an extra teaspoon or two if your peaches seem exceptionally juicy.
- How long do the bars need to cool before cutting? Allowing the bars to cool completely, ideally for several hours at room temperature until they are no longer warm to the touch, is crucial. Refrigerating them for an hour or two after they’ve cooled at room temperature can help them set even further and makes slicing much cleaner. Cutting warm bars will result in a messy, collapsed filling.
- Can I make this recipe gluten-free or vegan? Yes, you can adapt this recipe:
- Gluten-Free: Substitute the all-purpose flour in both the crust and the crumb topping with a 1:1 certified gluten-free all-purpose flour blend. Ensure any other ingredients are GF.
- Vegan: Substitute the unsalted butter in both the crust and the crumb topping with a plant-based butter alternative suitable for baking. Ensure the granulated and brown sugars are vegan.