Table of Contents
1. Introduction
There’s something undeniably magical about a jar of homemade jam. It’s a little pot of preserved sunshine, capturing the vibrant flavor of fresh fruit at its peak. And when that fruit is the quintessential taste of summer – plump, sweet strawberries – the result is pure bliss. Making your own strawberry jam is a rewarding process, filling your kitchen with a sweet, fruity aroma and leaving you with a delicious spread that far surpasses anything store-bought.
This recipe for Homemade Strawberry Jam is wonderfully simple, focusing on the pure taste of the fruit with just the right amount of sweetness and a touch of lemon for balance and set. It’s a traditional method, relying on the natural pectin in the strawberries and the added lemon juice to achieve a lovely, thick consistency as it simmers. Jam-making is an ancient practice, a way to preserve the bounty of harvest to be enjoyed throughout the year.
While modern methods sometimes involve added pectin for a quicker set, this recipe embraces a more classic approach, allowing the flavors to deepen as the strawberries cook down. The result is a rich, intensely flavored jam that’s perfect spread on toast, swirled into yogurt, or dolloped onto scones. It celebrates the simple perfection of fresh fruit, much like enjoying the pure taste of berries in recipes such as a Delicious Blueberry Cottage Cheese Breakfast Bake.
2. Recipe Summary
Cuisine: American / European (Preserves)
Difficulty Level: Easy
Total Preparation and Cooking Time: Approximately 30-35 minutes (plus cooling/setting time)
Dietary Classification: Vegetarian, Vegan, Gluten-Free
3. Equipment and Utensils
You don’t need much specialized equipment to make delicious jam:
- Large, heavy-bottomed saucepan or pot: A wide, heavy pot helps the jam cook evenly and reduces the risk of burning.2 The large size is important to prevent boil-overs as the jam simmers.
- Potato masher or fork: For lightly mashing the strawberries at the start.
- Measuring cups and spoons: For accurate measurement of strawberries, sugar, and lemon juice.
- Dry measuring cup (4 cups, 2 cups): For hulled strawberries and granulated sugar.
- Measuring spoon (tablespoon): For lemon juice.
- Long-handled spoon or heatproof spatula: For stirring the jam as it cooks. A wooden spoon is traditional.
- Small plate: To chill in the freezer for testing jam consistency.
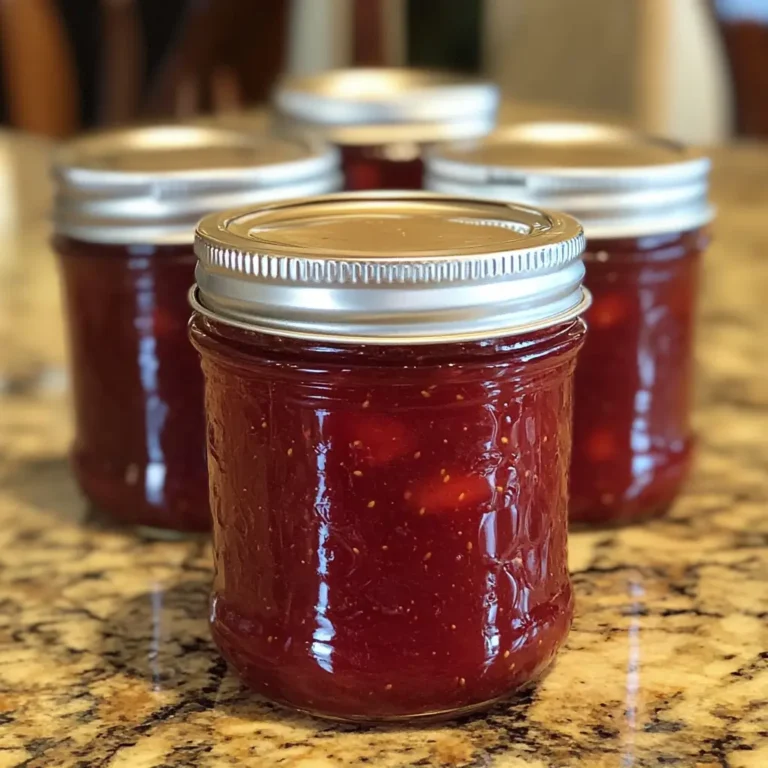
- Clean jars with lids and bands: You’ll need enough jars to hold approximately 4-5 cups of jam. Standard canning jars (like Mason jars) are ideal. Ensure jars and lids are clean and sterilized if planning long-term storage (see Storage section).
- Jar funnel (optional): Helps pour the hot jam into jars neatly.
- Ladle (optional): For transferring jam to jars.
- Canning supplies (for long-term storage): Water bath canner, jar rack, jar lifter, lid lifter (see Storage section).
4. Serving Suggestions
Homemade Strawberry Jam is incredibly versatile and elevates many dishes.
- Serving Vehicles:
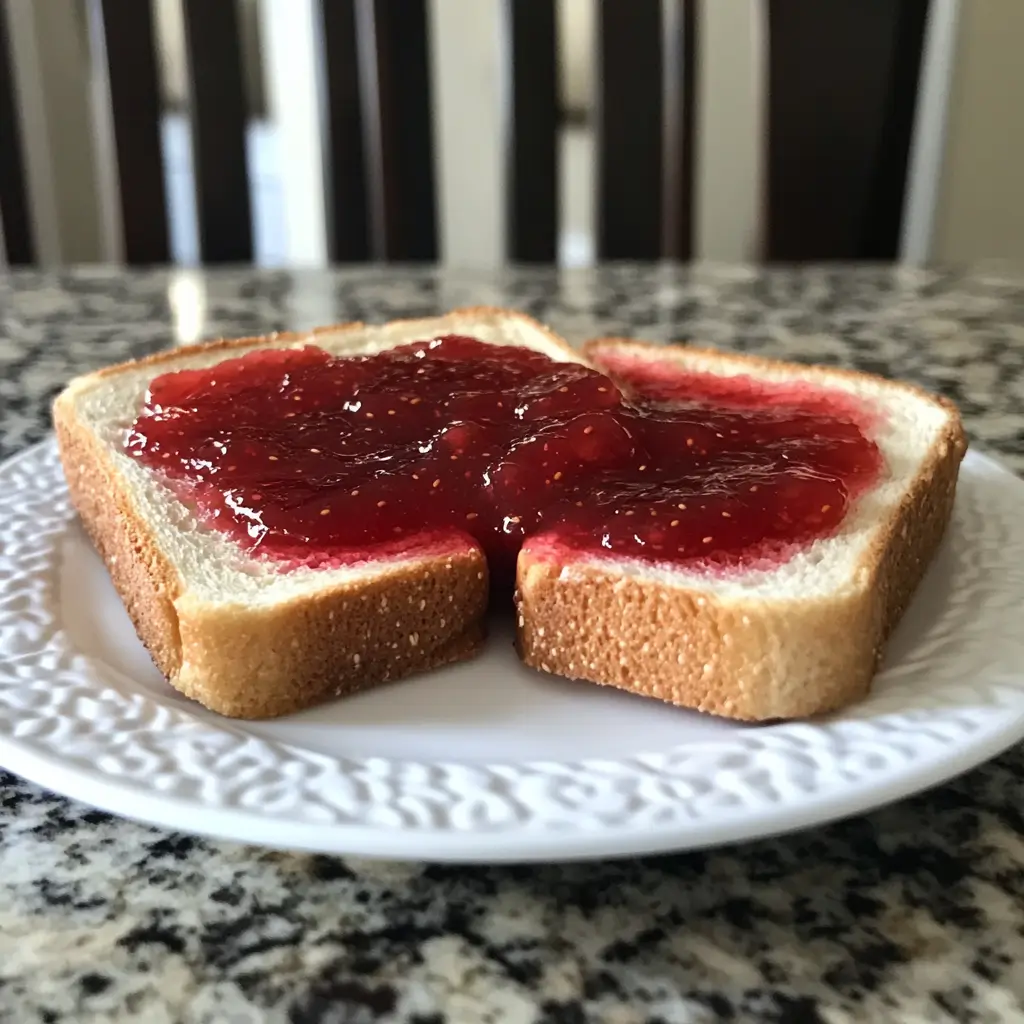
- Toast, Muffins, Scones, Biscuits: The classic way to enjoy jam. Spread generously over warm baked goods.
- Peanut Butter and Jelly Sandwiches: A timeless combination.
- Yogurt or Oatmeal: Swirl a spoonful into plain yogurt or hot oatmeal for added flavor and sweetness.
- Pancakes, Waffles, or Crepes: Top your breakfast favorites with warm or room-temperature jam.
- Ice Cream: A spoonful of jam is a simple but delicious topping for vanilla ice cream.
- Cheese Board: Serve alongside cheeses, crackers, and other accompaniments.
- Thumbprint Cookies or Tarts: Use as a filling for baked goods.
- Complementary Side Dishes: Depending on how you’re serving the jam, consider complementary items like butter for toast or fresh fruit alongside yogurt.
- Wine or Beverage Pairings:
- With breakfast or brunch items, coffee, tea, or milk are classic pairings.
- For a dessert application, a sparkling wine or a sweet Moscato could complement the jam’s sweetness and fruitiness.
5. Nutritional Information
Please note that the following nutritional information is an estimate per serving (based on an assumed serving size, like 1-2 tablespoons) and can vary based on the sweetness of the strawberries and the exact yield of the recipe. Jam is primarily carbohydrates from the sugar.3
Detailed Nutritional Breakdown (Estimate per 1 tablespoon serving):
- Calories: Approximately 50-70 kcal
- Macronutrient Distribution (Estimate):
- Carbohydrates: 12-17g (almost entirely from sugar and fruit)
- Protein: <1g
- Fat: <1g
- Dietary Information: Vegetarian, Vegan, Gluten-Free.
- Potential Health Benefits: Strawberries provide Vitamin C and antioxidants.4 However, due to the high sugar content, jam is calorie-dense and should be consumed in moderation as a treat.
6. Storage and Canning
Proper storage is essential for preserving your homemade jam. The provided recipe instructions only mention refrigeration for 3 weeks, but canning allows for much longer, shelf-stable storage.
- Proper Storage Instructions (Short-Term): Once cooled, the jam can be stored in clean jars in the refrigerator for up to 3 weeks, as noted in the recipe. Ensure the lids are tightly sealed.
- Proper Storage Instructions (Long-Term – Canning): For shelf-stable storage for up to a year (or even longer), you must process the filled jars in a boiling water bath. This kills potential bacteria and creates a vacuum seal.
Canning Process (Boiling Water Bath):
- Prepare Jars and Lids: Wash jars and lids in hot, soapy water and rinse well. Sterilize jars by boiling them in a large pot of water for 10 minutes or running them through a dishwasher sterilization cycle. Keep jars hot until filling. Warm lids and bands according to manufacturer instructions (often involves simmering in hot, not boiling, water).
- Fill Jars: Carefully ladle the hot jam into hot, sterilized jars, leaving about ½ inch of headspace (the space between the jam and the rim of the jar).
- Remove Air Bubbles: Use a clean, non-metallic utensil (like a plastic spatula or chopstick) to remove any air bubbles by running it around the inside of the jar.
- Wipe Rims: Wipe the rims of the jars clean with a damp cloth to ensure a proper seal.
- Place Lids and Bands: Center a warm lid on each jar and screw on the band fingertip-tight (just until resistance is met, do not overtighten).
- Process in Water Bath: Place the filled jars on a rack in a boiling water canner filled with enough hot water to cover the jars by at least 1 inch. Bring the water back to a rolling boil.
- Boil: Process pint jars for 10 minutes (adjust time for altitude if necessary).
- Cool: Carefully remove jars from the canner using a jar lifter and place them on a towel-lined surface, leaving space between jars. Let them cool completely for 12-24 hours.
- Check Seals: After cooling, check seals by pressing on the center of the lid. If it doesn’t flex, the jar is sealed. If a lid does not seal, refrigerate that jar and use the jam within 3 weeks, or reprocess it with a new lid.
- Store: Store sealed jars in a cool, dark place.
<!– end list –>
- Refrigeration Instructions: See Short-Term Storage above.
- Freezing Recommendations: Jam can be frozen in freezer-safe containers, leaving headspace as it will expand when frozen.5 It will keep in the freezer for up to a year. Thaw in the refrigerator.
7. Expert Tips and Variations
Elevate your Homemade Strawberry Jam with these expert tips and creative twists.
- Tips from Professional Chefs:
- Use ripe but firm strawberries: Overly ripe strawberries can result in a less vibrant flavor and may not set as well.
- Don’t rush the simmer: The simmering process is crucial for reducing the liquid and developing flavor and thickness. Stir frequently, especially towards the end, to prevent sticking.
- Test for set accurately: The cold plate test is a reliable method. You can also use a candy thermometer; jam typically sets around 220°F (104°C), but rely on the wrinkle test as the primary indicator for this recipe.
- Skim off foam: As the jam simmers, foam may rise to the surface. Skim this off with a spoon for a clearer, more attractive jam.
- Sterilize jars properly: If canning for long-term storage, proper sterilization is critical for food safety.
- Common Mistakes to Avoid:
- Not mashing enough: Leaving too many whole strawberries will result in a chunkier jam that may not set evenly.
- Boiling too vigorously during simmering: This can cause the jam to scorch on the bottom. Maintain a gentle simmer.
- Not stirring frequently enough: Increases the risk of the jam sticking and burning, especially as it thickens.
- Filling jars too full or not leaving headspace (for canning): Can prevent a proper seal.
- Not wiping jar rims (for canning): Food residue on the rim will prevent a proper seal.
- Creative Recipe Variations:
- Add balsamic vinegar: A tablespoon or two of good quality balsamic vinegar added during simmering can add a complex depth of flavor that pairs surprisingly well with strawberries.
- Add other fruits: Combine strawberries with rhubarb (as seen in other recipes like Amish Oatmeal Rhubarb Bars), raspberries, or blueberries. Adjust sugar slightly depending on the sweetness of the added fruit.
- Add spices or herbs: A pinch of black pepper, a few basil leaves (removed before jarring), or a split vanilla bean (removed before jarring) can add interesting flavor notes.
- Lemon zest: Add the zest of one lemon along with the juice for a brighter citrus flavor.
- Lower sugar version: Reducing the sugar amount will result in a less sweet jam, but it may also affect the set. You may need to add commercial pectin formulated for lower-sugar jams if you significantly reduce the sugar.
- Seasonal Adaptations: This jam is best made with fresh, in-season strawberries. While frozen strawberries can be used, the flavor may not be as vibrant, and you may need to simmer slightly longer to reduce excess liquid.
8. Ingredients Section
Using fresh, ripe strawberries is the most important ingredient for delicious homemade jam.
- 4 cups fresh strawberries, hulled and halved: Choose ripe, red strawberries. Wash them gently, remove the green hulls with a paring knife or huller, and halve them.
- 2 cups granulated sugar: Standard white granulated sugar provides sweetness and helps with the gelling process.6
- 2 tablespoons lemon juice: Freshly squeezed lemon juice is highly recommended. Lemon juice adds acidity, which is crucial for activating the pectin in the strawberries and ensuring the jam sets properly. It also brightens the flavor.
Measurement Conversions (Approximate):
- 4 cups fresh strawberries, hulled and halved = approx. 1.5 – 2 lbs (680-900g)
- 2 cups granulated sugar = approx. 400g
- 2 tablespoons lemon juice = approx. 30 ml
Quality and Sourcing Recommendations: Use fresh, peak-season strawberries for the best flavor. Their natural sweetness and pectin content will be highest.
Possible Ingredient Substitutions:
- Strawberries: While this is a strawberry jam recipe, the method can be adapted for other fruits (adjusting sugar and cook time based on the fruit’s sweetness and pectin content).
- Granulated sugar: Some recipes use less sugar, but be aware this affects the set and shelf life (unless using added pectin or canning properly). Other types of sugar can affect flavor and set.
- Lemon juice: Bottled lemon juice can be used, but fresh has a brighter flavor. The acidity is important for setting, so do not omit it.
Notes on Ingredient Preparation: Hull and halve the strawberries. Measure all ingredients accurately before combining in the saucepan. Have your clean jars ready before you start cooking the jam.
9. Step-by-Step Instructions
Making Homemade Strawberry Jam is a simple process that requires attention during cooking.
- Prepare the Ingredients:
- Wash the fresh strawberries gently under cool water.
- Remove the green hulls from the strawberries using a paring knife or huller.
- Halve the hulled strawberries.
- Squeeze the lemon juice and measure out the granulated sugar.
- Prepare your clean jars, lids, and bands. If canning, ensure they are sterilized and kept hot.
- Combine and Mash:
- In a large, heavy-bottomed saucepan or pot, combine the 4 cups of hulled and halved strawberries, the 2 cups of granulated sugar, and the 2 tablespoons of lemon juice.
- Use a potato masher or a fork to lightly mash the strawberries in the saucepan. You want to break down some of the fruit to release juices and help with setting, but leave some larger pieces for texture if you prefer a chunkier jam.
- Bring to a Boil:
- Place the saucepan over medium-high heat.
- Bring the mixture to a rolling boil, stirring frequently with a long-handled spoon or heatproof spatula to prevent sticking. This high heat helps activate the pectin.
- Simmer and Thicken:
- Once the mixture reaches a rolling boil, reduce the heat to a gentle simmer. The jam should be bubbling, but not so vigorously that it’s splashing excessively.
- Let it simmer for about 20–25 minutes, stirring occasionally at first, then more frequently as it thickens to prevent it from sticking to the bottom of the pan. The jam will darken in color and the bubbles will become thicker.
- Test for Consistency:
- While the jam is simmering, place a small plate in the freezer.
- After about 20 minutes of simmering, or when the jam appears thickened, carefully place a small spoonful of hot jam onto the cold plate.
- Let it cool on the plate for a minute or two.
- Gently push the edge of the jam with your finger. If the surface wrinkles and the jam doesn’t run excessively, it’s done and has reached the setting point. If it’s still too liquid, continue to simmer for a few more minutes and test again with another cold plate.
- Jar the Jam:
- Once the jam has reached the desired consistency, remove the saucepan from the heat.
- If any foam has accumulated on the surface, skim it off with a spoon.
- Carefully pour the hot jam into your clean jars, leaving about ½ inch of headspace at the top of each jar. A jar funnel can help with this.
- Wipe the rims of the jars clean with a damp cloth.
- Place lids and bands on the jars and screw the bands on fingertip-tight.
- Cool and Store:
- If planning short-term storage (refrigeration), let the jars of jam cool completely on the counter. As they cool, the jam will continue to thicken. Once cool, store in the refrigerator for up to 3 weeks.
- If planning long-term storage (canning), proceed with the boiling water bath process outlined in the Storage section above immediately after filling and sealing the jars.
Visual Cooking Cues:
- Initial mixture: Strawberries in liquid with sugar.
- Boiling: Mixture bubbles vigorously.
- Simmering: Bubbles become thicker, jam darkens and appears reduced.
- Cold plate test: Jam wrinkles when pushed.
- Jars after cooling (refrigerated): Jam is set to a spreadable consistency.
- Jars after canning and cooling: Lid is indented (sealed).
Possible Troubleshooting Tips:
- Jam didn’t set: This can happen if it wasn’t cooked long enough or if you didn’t use enough lemon juice. Return the jam to the saucepan, add another tablespoon of lemon juice (or a tiny pinch of powdered pectin if you have it and follow package instructions), and simmer again until it reaches the set point (test again on a cold plate).
- Jam is too thick: If the jam becomes too thick while cooking, you can stir in a tablespoon or two of hot water at the very end, stirring until incorporated, before jarring.
- Jam burned on the bottom: This is usually due to the heat being too high during simmering or not stirring frequently enough, especially as it thickens. Use a heavy-bottomed pot and stir diligently.
Explanation of Cooking Methods:
- Mashing: Helps release the juices from the strawberries, which are essential for the cooking process and pectin activation.7
- Boiling: High heat at the start helps break down the fruit and activate natural pectin.
- Simmering: Lower heat for an extended period reduces the liquid through evaporation, concentrates the flavors, and allows the pectin to work with the sugar and acid to create a gel that sets the jam.
- Testing for Set: Checking the consistency is crucial as the setting point is when the jam transitions from liquid to a gel.
- Jarring: Transferring the hot jam into clean jars for storage.
- Canning (Boiling Water Bath): A heat preservation method that creates a vacuum seal, allowing for shelf-stable storage at room temperature.
10. Frequently Asked Questions (FAQ)
Here are some common questions about making Homemade Strawberry Jam:
- Do I need to add pectin? This recipe relies on the natural pectin in the strawberries and the added lemon juice to set. If you follow the instructions and cook it for the recommended time (or until it passes the cold plate test), you likely won’t need added pectin for a soft set. If you prefer a very firm set or want to reduce the sugar significantly, you would need to use commercial pectin formulated for jams.
- What kind of strawberries are best? Fresh, ripe, in-season strawberries will give you the best flavor and natural pectin levels.
- How can I crush the biscuits for the Rhubarb Cheesecake crust easily? (This question seems to relate to a previous recipe, but I can answer it here as it was included in the instructions). You can put the biscuits in a zip-top bag and crush them with a rolling pin, or pulse them in a food processor until fine crumbs are formed.
- How long does homemade jam last? If stored properly in the refrigerator, this recipe will last about 3 weeks. If processed correctly using a boiling water bath canning method, sealed jars of jam are shelf-stable and can last for a year or even longer in a cool, dark place. Once opened, refrigerated jam should be consumed within 3 weeks.
- Can I reduce the sugar? Reducing the sugar will affect the jam’s set and preservation. If you significantly reduce the sugar, the jam will be softer and may not set without added pectin. Lower-sugar jams also require canning for shelf stability.
- Why did my jam not set? Common reasons include not cooking it long enough to reach the setting point, not using enough lemon juice, or using under-ripe strawberries (which have less pectin).
- Can I use frozen lemon juice? Freshly squeezed lemon juice is recommended for the best flavor, but bottled lemon juice can be used. The acidity level is important for the set.
Making Homemade Strawberry Jam is a simple pleasure that yields delicious rewards. It’s a taste of summer captured in a jar, ready to brighten your day whenever you open it. Enjoy the sweet, vibrant flavor!