Table of Contents
Table of Contents
1. Introduction
There’s a universally acknowledged truth in the culinary world: few things beat the sheer comfort and deliciousness of a classic cheeseburger. That perfect symphony of savory ground beef, melting cheese, a hint of pickle, and a special sauce, all nestled in a soft bun, is a taste sensation that transcends age and cultural divides. But what if you could take that beloved experience and make it even more convenient, more portable, and dare we say, even more fun? Enter the wondrous world of Cheeseburger Pockets.
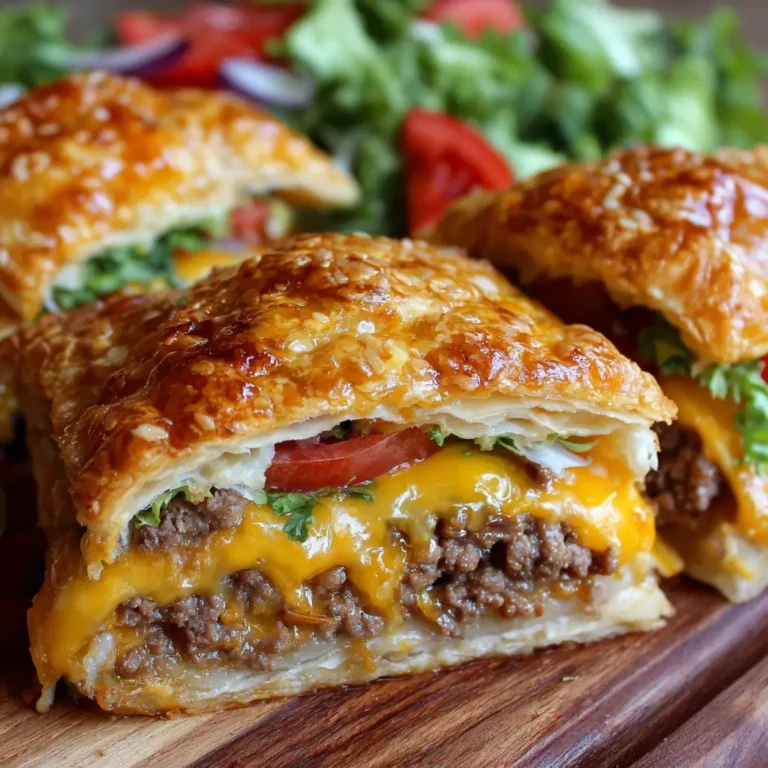
Imagine sinking your teeth into a warm, golden-brown pastry pocket, its flaky exterior giving way to a rich, cheesy, and perfectly seasoned ground beef filling. It’s all the iconic flavor of a traditional cheeseburger, expertly tucked into a handheld package – no messy bun crumbling, no toppings sliding off, just pure, unadulterated enjoyment in every bite. This recipe isn’t just about combining ingredients; it’s about reinventing a classic for modern life, offering a delightful solution for busy weeknights, grab-and-go lunches, or effortless entertaining.
The concept of encasing savory fillings in dough isn’t new; civilizations across the globe have perfected their own versions, from the Cornish pasty to the Argentinian empanada, the Indian samosa, and the Polish pierogi. The Cheeseburger Pocket, in essence, is a charming American interpretation of this ancient culinary tradition, a natural evolution spurred by a desire for convenience and an enduring love for diner-style comfort food. It takes the familiar flavors of a backyard barbecue – the sizzle of beef, the sharpness of cheddar, the tang of ketchup and mustard – and transforms them into a neat, self-contained meal that’s both whimsical and deeply satisfying.
For many, these pockets evoke a sense of nostalgic comfort, reminiscent of school lunch favorites or quick-fix dinners from childhood. But don’t mistake them for mere convenience food; when made at home with fresh, quality ingredients, they elevate the experience entirely. Each pocket becomes a testament to home cooking, infused with care and tailored to your family’s preferences.
It’s a culinary hug, a portable party, and a surefire way to bring smiles to faces around the dinner table. Whether you’re feeding a crowd, preparing for a game night, or simply craving that irresistible cheeseburger taste without the fuss, these homemade Cheeseburger Pockets are poised to become a cherished addition to your recipe repertoire. They represent the ultimate fusion of classic flavor and modern practicality, promising a delightful culinary adventure with every golden, savory bite.
2. Recipe Summary
The Cheeseburger Pockets recipe is a delightful foray into American comfort food, offering a creative and convenient twist on a beloved classic.
- Cuisine: American Comfort Food
- Difficulty Level: Easy to Medium. This recipe is highly accessible for home cooks of all skill levels, especially when utilizing store-bought dough. The steps involve basic cooking techniques like browning meat and assembling pastries.
- Total Preparation and Cooking Time:
- Prep Time: Approximately 30-40 minutes (includes preparing the filling, rolling and cutting dough).
- Cook Time: Approximately 20-25 minutes.
- Total Time: Approximately 50-65 minutes.
- Dietary Classification: This recipe, as presented, is primarily Meat-based and contains Dairy (cheese) and Gluten (from the dough). It is not suitable for vegetarian, vegan, gluten-free, or dairy-free diets without significant substitutions and modifications (which will be discussed in the variations section). It’s a hearty, satisfying dish perfect for those looking for a flavorful and filling meal.
3. Equipment and Utensils
Having the right tools on hand can make the preparation of your Cheeseburger Pockets a smooth and enjoyable process. Here’s a comprehensive list of what you’ll need:
- Large Skillet or Frying Pan: A 10-inch (25 cm) or 12-inch (30 cm) non-stick or cast-iron skillet is ideal for browning the ground beef and sautéing the aromatics.
- Colander: Essential for draining excess fat from the cooked ground beef, ensuring your pockets aren’t greasy.
- Cutting Board: For safely dicing your onion and mincing garlic.
- Chef’s Knife: A sharp knife is crucial for efficient and safe chopping of ingredients.
- Medium Mixing Bowl: To combine the cooked beef filling with cheese and other ingredients.
- Measuring Cups and Spoons: For accurate measurement of liquids and dry ingredients (e.g., ketchup, mustard, Worcestershire sauce, salt, pepper).
- Baking Sheets: Two large baking sheets (approx. 13×18 inches or 33×46 cm) are recommended to avoid overcrowding the oven, allowing the pockets to bake evenly and achieve a golden-brown crust.
- Parchment Paper or Silicone Baking Mats: To line your baking sheets. This prevents sticking, ensures easy cleanup, and helps the bottoms of the pockets brown beautifully.
- Rolling Pin: For rolling out the dough to your desired thickness and shape. A standard 10-inch (25 cm) to 15-inch (38 cm) rolling pin works well.
- Pastry Brush: For applying the egg wash to the pockets, giving them that irresistible golden sheen.
- Spatula: A sturdy spatula or wooden spoon for stirring the beef and scraping the bottom of the skillet.
- Fork: Used for crimping the edges of the dough to seal the pockets securely.
- Small Bowl: For whisking the egg wash.
- Optional Utensils:
- Pizza Cutter: Can be helpful for quickly cutting the dough into squares or rectangles.
- Round Cookie Cutter: If you prefer uniform, circular pockets, a 4-inch (10 cm) to 5-inch (12.5 cm) round cutter can be used.
- Grater: If you’re shredding your own block of cheese instead of using pre-shredded.
Ensure all your equipment is clean and ready before you begin cooking to streamline the process.
4. Serving Suggestions
Cheeseburger Pockets are wonderfully versatile and can be served in a variety of ways, whether as a casual family dinner, a fun party appetizer, or a hearty lunch. Here’s how to make them shine:
- Plating Recommendations:
- Rustic & Comforting: Serve the pockets warm, perhaps stacked on a wooden board or a rustic platter. A sprinkle of fresh chopped parsley or chives adds a pop of color and freshness.
- Dipping Station: Arrange them around a central bowl of dipping sauces. This not only makes for an attractive presentation but also encourages guests to customize their experience.
- Individual Servings: For a more structured meal, place one or two pockets on an individual plate alongside a fresh side salad.
- Side Dish Ideas:
- Classic Companions: You can’t go wrong with traditional cheeseburger sides! Think crispy French fries, golden onion rings, or a classic coleslaw.
- Fresh & Light: To balance the richness of the pockets, a crisp green salad with a light vinaigrette is an excellent choice. A simple cucumber and tomato salad also works beautifully.
- Hearty & Satisfying: For a more substantial meal, consider pairing them with Easy Taco Pasta Salad Recipe or even a warm bowl of Creamy Cajun Potato Soup during colder months.
- Pickle Power: Don’t forget the pickles! Dill pickle spears or sweet gherkins offer a delightful acidic crunch that cuts through the richness of the cheeseburger filling.
- Veggie Boost: Roasted broccoli, corn on the cob, or steamed green beans make for healthy and delicious accompaniments.
- Beverage Pairings:
- Family-Friendly: Classic choices include sparkling lemonade, root beer, cola, or iced tea.
- Adult Pairings:
- Beer: A crisp lager, a hoppy pale ale, or a malty amber ale would complement the savory flavors of the beef and cheese beautifully.
- Wine: For wine enthusiasts, a light-bodied red like a Pinot Noir or a Beaujolais can work, offering fruit notes that contrast nicely with the richness. A chilled, dry Rosé is also a refreshing option.
- Spirits: A classic Whiskey Sour or a simple Highball can also be a fun pairing for a casual adult gathering.
Remember, the best way to serve Cheeseburger Pockets is with a smile and the knowledge that you’re offering a crowd-pleasing, delicious meal that everyone will love!
5. Nutritional Information
While Cheeseburger Pockets are undeniably a delicious comfort food, it’s helpful to understand their estimated nutritional contribution. Please note that these values are approximations and can vary based on specific ingredient brands, cooking methods, and serving sizes. For this recipe, one serving is typically considered one pocket.
Estimated Nutritional Values per Serving (1 Cheeseburger Pocket):
- Calories: Approximately 350-450 calories. This can fluctuate based on the leanness of the ground beef, the amount and type of cheese, and the specific dough used (e.g., crescent roll dough vs. pizza dough).
- Macronutrient Distribution:
- Protein: Around 18-25g. The ground beef is an excellent source of protein, essential for muscle repair and satiety.
- Fat: Approximately 20-30g. This includes saturated and unsaturated fats from the beef, cheese, and dough. Draining the beef fat thoroughly helps reduce the overall fat content.
- Carbohydrates: Roughly 25-35g. The majority of carbohydrates come from the dough, with smaller amounts from the ketchup and other ingredients.
- Dietary Information:
- High in Protein: Contributes significantly to daily protein intake.
- Source of Iron: Red meat provides heme iron, which is readily absorbed by the body.
- Good Source of Calcium: The cheese contributes a substantial amount of calcium, vital for bone health.
- Sodium: Can be moderate to high, depending on the salt added, processed cheese, and dough. Using low-sodium ingredients where possible can help manage this.
- Fiber: Low, as typical for meat and refined dough dishes. Pairing with high-fiber side dishes like a large green salad or roasted vegetables is recommended.
- Health Benefits (in moderation):
- Energy Boost: The combination of fats, proteins, and carbohydrates provides a good source of energy.
- Satiety: The high protein and fat content helps keep you feeling full and satisfied, potentially preventing overeating later.
- Nutrient-Rich: Beyond protein and calcium, ground beef also provides B vitamins (B12, niacin, B6), zinc, and selenium.
- Comfort Food Factor: The psychological benefits of enjoying a comforting, delicious meal shouldn’t be underestimated. Eating foods you enjoy can contribute to overall well-being and happiness.
Tips for a Healthier Twist:
- Choose Leaner Meat: Opt for 90/10 or 93/7 lean ground beef to reduce saturated fat.
- Increase Veggies: Incorporate finely diced bell peppers, mushrooms, or spinach into the filling for added nutrients and fiber.
- Mind Your Portions: Enjoying one pocket as a serving and pairing it with a generous portion of vegetables or a light salad helps create a balanced meal.
- Homemade Dough: If you make your own dough, you have more control over the type of flour and fats used.
While Cheeseburger Pockets are a hearty and indulgent treat, understanding their nutritional profile allows for informed choices and balanced eating.
6. Storage and Reheating
One of the great advantages of Cheeseburger Pockets is their excellent make-ahead and meal-prep potential. Whether you have leftovers or want to prepare them for future enjoyment, proper storage and reheating are key to maintaining their deliciousness.
- Storage Instructions (Cooked Pockets):
- Refrigeration: Once the Cheeseburger Pockets have cooled completely to room temperature (this is crucial to prevent condensation and sogginess), transfer them to an airtight container. They will keep well in the refrigerator for up to 3-4 days. For best results, place a paper towel at the bottom of the container to absorb any excess moisture.
- Freezing: Cooked Cheeseburger Pockets freeze beautifully.
- Allow them to cool completely.
- Arrange them in a single layer on a baking sheet and place in the freezer for 1-2 hours, or until solid. This “flash freezing” prevents them from sticking together.
- Once solid, transfer the frozen pockets to a freezer-safe bag or airtight container. Remove as much air as possible to prevent freezer burn.
- They can be stored in the freezer for up to 2-3 months. Label with the date for easy tracking.
- Storage Instructions (Uncooked Pockets – for baking later):
- Refrigeration: You can assemble the pockets, place them on a parchment-lined baking sheet, cover loosely with plastic wrap, and refrigerate for up to 1 day before baking. This is great for morning-of prep for an evening meal.
- Freezing: Unbaked pockets can also be frozen for later.
- Assemble the pockets and place them in a single layer on a parchment-lined baking sheet.
- Flash freeze until solid (1-2 hours).
- Transfer to a freezer-safe bag or container, again removing as much air as possible.
- Freeze for up to 1 month. When ready to bake, you may need to add an extra 5-10 minutes to the baking time, or thaw them partially in the fridge first. Do not egg wash until just before baking.
- Reheating Methods:
- Oven (Recommended for Best Quality): This method helps restore the crispy crust.
- Preheat your oven to 350°F (175°C).
- Place the pockets on a baking sheet (from fridge or frozen, though frozen will take longer).
- Bake for 10-15 minutes if refrigerated, or 20-30 minutes if frozen (until heated through and the crust is crisp).
- Air Fryer (Excellent Alternative): A fantastic way to get a crispy crust quickly.
- Preheat air fryer to 325°F (160°C).
- Place pockets in a single layer in the air fryer basket, ensuring they don’t touch.
- Air fry for 5-8 minutes if refrigerated, or 10-15 minutes if frozen, flipping halfway through, until heated and crisp.
- Microwave (Quickest, but Softer Crust):
- Place one or two pockets on a microwave-safe plate.
- Heat on high for 60-90 seconds (if refrigerated) or 2-3 minutes (if frozen), until heated through. Be aware that the crust will be softer and not crispy with this method.
No matter how you store or reheat them, these Cheeseburger Pockets are designed to be a convenient and delicious part of your meal planning!
7. Expert Tips and Variations
Elevate your Cheeseburger Pockets from good to absolutely outstanding with these professional chef tips, common mistake warnings, and exciting variations.
- Professional Chef Tips for Perfection:
- Drain the Fat Thoroughly: This is perhaps the most crucial tip. Excess fat in the filling will make your pockets greasy and potentially soggy, leading to a less pleasant texture and even causing them to burst. After browning the beef, tilt the skillet and use a spoon or paper towels to remove every bit of rendered fat.
- Chill the Filling: A cooled filling is much easier to work with. If the filling is hot, it can soften the dough, making it sticky and difficult to seal, and potentially leading to blowouts during baking. Allow it to cool to at least room temperature, or even refrigerate it for 15-20 minutes for easier handling.
- Don’t Overfill: It’s tempting to cram in as much delicious filling as possible, but overfilling is a common cause of pockets bursting open. Stick to the recommended amount – about 1/4 cup (60ml) per pocket – to ensure a good seal.
- Secure the Seal: Take your time to properly seal the edges. Press firmly with your fingers, then use the tines of a fork to create a decorative and secure crimp. This prevents the filling from leaking out.
- Egg Wash for Golden Glory: Don’t skip the egg wash! A simple whisked egg mixed with a tablespoon of water or milk brushed over the dough before baking gives the pockets that beautiful, glossy, golden-brown crust and a professional finish. It also helps sesame seeds adhere.
- Ventilation is Key: Create a couple of small slits on the top of each pocket before baking. This allows steam to escape, preventing the pockets from puffing up too much and potentially bursting.
- Common Mistakes to Avoid:
- Soggy Bottoms: Often caused by not draining the beef fat adequately or by having a filling that is too wet. Ensure all liquid is cooked off and fat is drained.
- Bursting Pockets: Usually a result of overfilling or an inadequate seal. Refer to the tips above!
- Uneven Baking: Overcrowding your baking sheet can lead to pockets that don’t brown evenly. Give them space to breathe, using two baking sheets if necessary. Rotate the baking sheets halfway through baking for uniform results.
- Undercooked Dough: If your oven runs cool or your pockets are very thick, they might need a few extra minutes. The dough should be golden brown and firm to the touch.
- Recipe Variations for Endless Creativity:
- Cheese Choices: While cheddar is classic, feel free to experiment. Pepper Jack adds a spicy kick, mozzarella offers a milder, stringier melt, or a blend of cheddar and Monterey Jack provides a creamy richness.
- Meat Alternatives:
- Ground Turkey/Chicken: For a leaner option, substitute ground turkey or chicken. You might need to add a touch more oil to the pan as they tend to be drier.
- Plant-Based Ground: Vegetarian and vegan friends can enjoy these too! Use a plant-based ground meat substitute and vegan cheese.
- Flavor Boosters & Add-ins:
- Bacon: Crumbled, cooked bacon mixed into the filling is a no-brainer for a “bacon cheeseburger” pocket.
- Veggies: Finely diced bell peppers, sautéed mushrooms, or a handful of fresh spinach can be added to the beef filling.
- Heat: A pinch of red pepper flakes or finely diced jalapeños (seeded for less heat) will add a pleasant warmth.
- Pickles: Incorporate a tablespoon or two of finely diced dill pickles directly into the filling for an authentic burger tang.
- Sauce Swaps: Instead of classic ketchup and mustard, try a smoky BBQ sauce, a tangy Thousand Island dressing, or a spicy chipotle mayo. For a truly unique and vibrant twist, consider adding a dollop of Spicy Pomegranate Guacamole as an internal sauce or serving it on the side.
- Dough Options:
- Puff Pastry: For a truly flaky, buttery crust, puff pastry is an excellent substitute.
- Biscuit Dough: Canned biscuit dough can also be flattened and used for a softer, bread-like pocket.
- Homemade Pizza Dough: If you’re feeling ambitious, a homemade yeast dough offers a chewier, more substantial pocket.
- Mini Quiche Bites use a similar pastry concept but with a different filling, showing the versatility of dough.
- Shape Variations:
- Half-Moons: Use a round cutter, place filling on one half, fold, and crimp.
- Rectangles: Cut dough into rectangles, place filling in the center, fold one side over, and seal.
- Pigs in a Blanket Wreath also showcases dough versatility in a fun, festive shape!
- Seasonal Adaptations:
- Winter Warmth: For a hearty winter meal, add a touch of smoked paprika or a dash of hot sauce to the filling. Serve with a robust soup.
- Summer Refresh: Keep the filling lighter with ground turkey and fresh herbs. Serve alongside a vibrant corn salad.
With these tips and variations, your Cheeseburger Pockets will not only be delicious but also perfectly customized for any occasion or preference.
8. Ingredients Section
Crafting the perfect Cheeseburger Pocket starts with a thoughtful selection of ingredients. Here’s what you’ll need, with convenient measurement conversions and helpful tips for sourcing and substitutions.
Yields: Approximately 8-10 pockets
Prep time: 30-40 minutes
Cook time: 20-25 minutes
For the Savory Filling:
- 1 pound (approx. 450g) Lean Ground Beef:
- Sourcing: Choose 85/15 or 90/10 lean ground beef for optimal flavor and less grease. Look for ethically raised, grass-fed options if available.
- Substitution: Ground turkey, ground chicken, or a plant-based ground meat substitute (e.g., Impossible, Beyond) for a lighter or vegetarian option. Adjust seasoning as needed.
- 1/2 medium Onion (approx. 100g), finely diced:
- Sourcing: Fresh, firm yellow or white onion.
- Substitution: 1/4 teaspoon onion powder if fresh onion is unavailable, though fresh is highly recommended for flavor and texture.
- 2-3 cloves Garlic (approx. 10-15g), minced:
- Sourcing: Fresh garlic cloves for the best aroma and taste.
- Substitution: 1/2 teaspoon garlic powder.
- 1/4 cup (approx. 60ml) Ketchup:
- Sourcing: Your preferred brand of classic tomato ketchup.
- Substitution: BBQ sauce for a smoky twist, or a sugar-free ketchup if preferred.
- 2 tablespoons (approx. 30ml) Yellow Mustard or Dijon Mustard:
- Sourcing: Classic yellow mustard for a traditional burger taste, or Dijon for a slightly sharper, more sophisticated flavor.
- Substitution: Stone-ground mustard for added texture and pungency.
- 1 tablespoon (approx. 15ml) Worcestershire Sauce:
- Sourcing: A key ingredient for umami depth in beef dishes.
- Substitution: A dash of soy sauce or tamari (for gluten-free) combined with a pinch of brown sugar and apple cider vinegar can approximate the flavor.
- 1/2 teaspoon (approx. 2.5g) Salt, or to taste:
- Sourcing: Fine sea salt or kosher salt.
- 1/4 teaspoon (approx. 1g) Black Pepper, freshly ground, or to taste:
- Sourcing: Freshly ground for best flavor.
- 1.5 cups (approx. 170g) Shredded Cheddar Cheese:
- Sourcing: Sharp or mild cheddar, pre-shredded for convenience or shred from a block for better melt.
- Substitution: Monterey Jack, Pepper Jack (for spice), Colby, or a cheddar-jack blend. For a creamy texture, American cheese slices can be torn and mixed in.
For the Pockets:
- 2 cans (approx. 8 ounces / 226g each) Refrigerated Crescent Roll Dough or Pizza Dough:
- Sourcing: Found in the refrigerated section of most grocery stores. Crescent roll dough yields a flakier pocket, while pizza dough results in a chewier, breadier texture.
- Substitution: Puff pastry sheets (for extra flakiness), homemade pizza dough, or biscuit dough (flattened). Ensure adequate flour for rolling.
- 1 Large Egg:
- Sourcing: Standard large chicken egg.
- Substitution: For an egg-free wash, use a splash of milk (dairy or non-dairy) or melted butter for browning, though the golden sheen won’t be as pronounced.
- 1 tablespoon (approx. 15ml) Water:
- Sourcing: Tap water.
- 1 teaspoon (approx. 5g) Sesame Seeds (optional, for topping):
- Sourcing: Found in the spice aisle.
- Substitution: Poppy seeds, everything bagel seasoning, or simply omit.
Ingredient Sourcing Recommendations:
Prioritize fresh, high-quality ingredients where possible. For ground beef, a local butcher can offer excellent cuts and provide information on sourcing. When choosing cheese, shredding from a block often melts better and has a richer flavor than pre-shredded varieties, which sometimes contain anti-caking agents.

9. Step-by-Step Instructions
Follow these detailed, numbered instructions to create perfect, golden-brown Cheeseburger Pockets every time. Pay close attention to culinary techniques and crucial cooking cues for the best results.
Before You Begin (Mise en Place):
- Gather Ingredients: Ensure all your ingredients are measured and ready.
- Preheat Oven & Prep Pans: Preheat your oven to 375°F (190°C). Line two large baking sheets with parchment paper or silicone baking mats. This is important to prevent sticking and aid in easy cleanup.
- Prep Aromatics: Finely dice the onion and mince the garlic. Shred the cheddar cheese if using a block.
Step 1: Prepare the Savory Cheeseburger Filling
- Brown the Beef: Place a large skillet (10-inch/25cm or 12-inch/30cm) over medium-high heat. Add the lean ground beef. Break it up with a spatula and cook, stirring occasionally, until it’s fully browned and no pink remains, approximately 5-7 minutes.
- Add Aromatics: Add the finely diced onion to the skillet with the beef. Cook for another 3-5 minutes, until the onion softens and becomes translucent. Stir in the minced garlic and cook for an additional 1 minute, until fragrant. Be careful not to burn the garlic.
- Drain Excess Fat: This is a critical step to prevent soggy pockets. Tilt the skillet and carefully spoon or pour off any accumulated fat. You can also use a paper towel to blot the excess, ensuring the filling is as dry as possible.
- Season the Filling: Return the skillet to the heat (if needed, on low). Stir in the ketchup, mustard, and Worcestershire sauce. Mix thoroughly until the beef is evenly coated. Season with salt and black pepper to taste. Cook for 2-3 minutes, allowing the flavors to meld and any remaining liquid to evaporate.
- Cool the Filling: Remove the skillet from the heat. Transfer the beef mixture to a medium mixing bowl. Allow the filling to cool completely to room temperature. This prevents the dough from becoming too soft and sticky, making it much easier to work with. You can speed this up by placing the bowl in the refrigerator for 15-20 minutes.
- Add Cheese: Once the filling is cool, stir in the shredded cheddar cheese. Mix until well combined. The cheese will melt slightly during baking, creating that gooey cheeseburger experience.
Step 2: Assemble the Cheeseburger Pockets
- Prepare the Dough:
- If using crescent roll dough: Unroll the dough sheets onto a lightly floured surface. You’ll typically find perforations. Press these perforations together to create two solid rectangles. If desired, you can gently roll each rectangle slightly larger with a rolling pin to get more surface area.
- If using pizza dough: Roll out the pizza dough on a lightly floured surface to about a 1/8 to 1/4-inch (3-6mm) thickness. Aim for a large rectangle.
- Cut the Dough: Using a pizza cutter or a sharp knife, cut each dough rectangle into 4-5 smaller rectangles or squares. The size will depend on how large you want your pockets, but typically aiming for roughly 4×5 inches (10×12.5 cm) per piece is a good start. This should yield 8-10 pockets in total from two cans of crescent dough or 1 lb of pizza dough.
- Portion the Filling: Place approximately 1/4 cup (60ml) of the cooled cheeseburger filling onto one half of each dough rectangle, leaving a clear border around the edges. Troubleshooting Tip: Do not overfill! This is crucial for preventing the pockets from bursting during baking.
- Fold and Seal the Pockets:
- Carefully fold the other half of the dough over the filling, aligning the edges to form a sealed pocket.
- Press the edges firmly together with your fingers to seal.
- For a decorative and secure seal, use the tines of a fork to crimp all around the edges of each pocket. This creates a tight seal and an attractive pattern.
- Transfer to Baking Sheets: Carefully transfer the assembled pockets to your prepared baking sheets, leaving about 1 inch (2.5 cm) of space between each pocket to allow for even baking.
Step 3: Bake to Golden Perfection
- Prepare Egg Wash: In a small bowl, whisk together the large egg with 1 tablespoon of water until well combined. This is your egg wash.
- Brush and Garnish: Using a pastry brush, lightly brush the top of each Cheeseburger Pocket with the egg wash. This will give them a beautiful golden-brown, glossy finish. If desired, sprinkle a small amount of sesame seeds over the top of each pocket for an authentic burger bun look.
- Vent the Pockets: Using a sharp knife, make 2-3 small slits on the top of each pocket. This allows steam to escape during baking, preventing them from puffing up too much and bursting.
- Bake: Place the baking sheets in the preheated oven. Bake for 20-25 minutes, or until the dough is golden brown and puffed, and the filling is hot and bubbly.
- Cooking Cue: The crust should be firm to the touch and a rich golden color.
- Troubleshooting Tip: If one tray is browning faster than the other, rotate the trays halfway through baking, or swap their positions in the oven.
- Cool and Serve: Once baked, carefully remove the baking sheets from the oven. Let the Cheeseburger Pockets cool on the baking sheet for 5-10 minutes before serving. This allows the filling to set and prevents burns from the hot cheese.
Serve warm with your favorite dipping sauces, pickles, or a fresh side salad. Enjoy your homemade, satisfying Cheeseburger Pockets!
10. Frequently Asked Questions (FAQ)
Here are some common questions about making and enjoying Cheeseburger Pockets, with clear and helpful answers.
Q1: Can I use different types of dough for Cheeseburger Pockets?
Absolutely! While refrigerated crescent roll dough or pizza dough are popular for their convenience, you can experiment. Puff pastry will give you a very flaky, buttery crust. Canned biscuit dough can be flattened and used for a softer, bread-like pocket. If you enjoy baking from scratch, a homemade yeast dough can also be adapted for a chewier texture. Adjust baking times as necessary when using different dough types.
Q2: How do I prevent my Cheeseburger Pockets from getting soggy?
The key to avoiding soggy pockets lies mainly in the filling. First, ensure you drain all excess fat from the ground beef after browning. Any residual grease will seep into the dough. Second, make sure the filling cools completely before mixing in the cheese and assembling the pockets. A hot filling will steam the dough, making it soft and prone to sogginess. Finally, don’t overcrowd your baking sheets; allow space for air circulation for even baking and crispness.
Q3: Can I make Cheeseburger Pockets ahead of time?
Yes, these are excellent for meal prep! You can assemble the pockets (without egg wash) and refrigerate them for up to 24 hours before baking. For longer storage, freeze them. You can freeze cooked pockets (after cooling) or even uncooked, assembled pockets. Flash freeze them on a baking sheet until solid, then transfer to a freezer-safe bag. Cooked pockets can be reheated from frozen, and uncooked pockets can be baked from frozen (adding extra baking time) or thawed first.
Q4: What other fillings can I try in these pockets?
The possibilities are endless! Think beyond cheeseburger.
- BBQ Chicken Pockets: Shredded cooked chicken mixed with your favorite BBQ sauce.
- Pepperoni Pizza Pockets: Pepperoni, mozzarella, and a touch of pizza sauce.
- Breakfast Pockets: Scrambled eggs, cooked sausage or bacon, and cheddar cheese.
- Philly Cheesesteak Pockets: Sliced steak, onions, peppers, and provolone.
- Veggie Delight Pockets: Sautéed mushrooms, spinach, bell peppers, and feta or mozzarella.
Q5: Are these Cheeseburger Pockets suitable for packed lunches?
They are perfect for packed lunches! Once baked and cooled, they hold up well at room temperature for several hours. For best enjoyment, they can be reheated in a microwave or toaster oven at lunchtime. They are also a fantastic alternative to traditional sandwiches for kids, offering a fun and delicious surprise in their lunchboxes.
Q6: How can I achieve an extra golden and crispy crust?
The secret to that beautiful golden-brown, slightly glossy crust is the egg wash. Whisk one egg with a tablespoon of water or milk and brush it generously over the pockets just before baking. This not only enhances color but also contributes to a slightly crisper finish. Ensuring your oven is preheated to the correct temperature and baking them on parchment paper or silicone mats also aids in achieving an even, golden crust.
Q7: Can I bake Cheeseburger Pockets in an air fryer?
Yes, you can! The air fryer is an excellent tool for reheating and even baking these pockets, often resulting in an extra-crispy exterior. Preheat your air fryer to around 325-350°F (160-175°C). Place pockets in a single layer, ensuring they don’t touch, and air fry for 8-15 minutes (depending on whether they are fresh or frozen), flipping halfway through, until golden brown and heated through. Keep an eye on them, as air fryer times can vary.